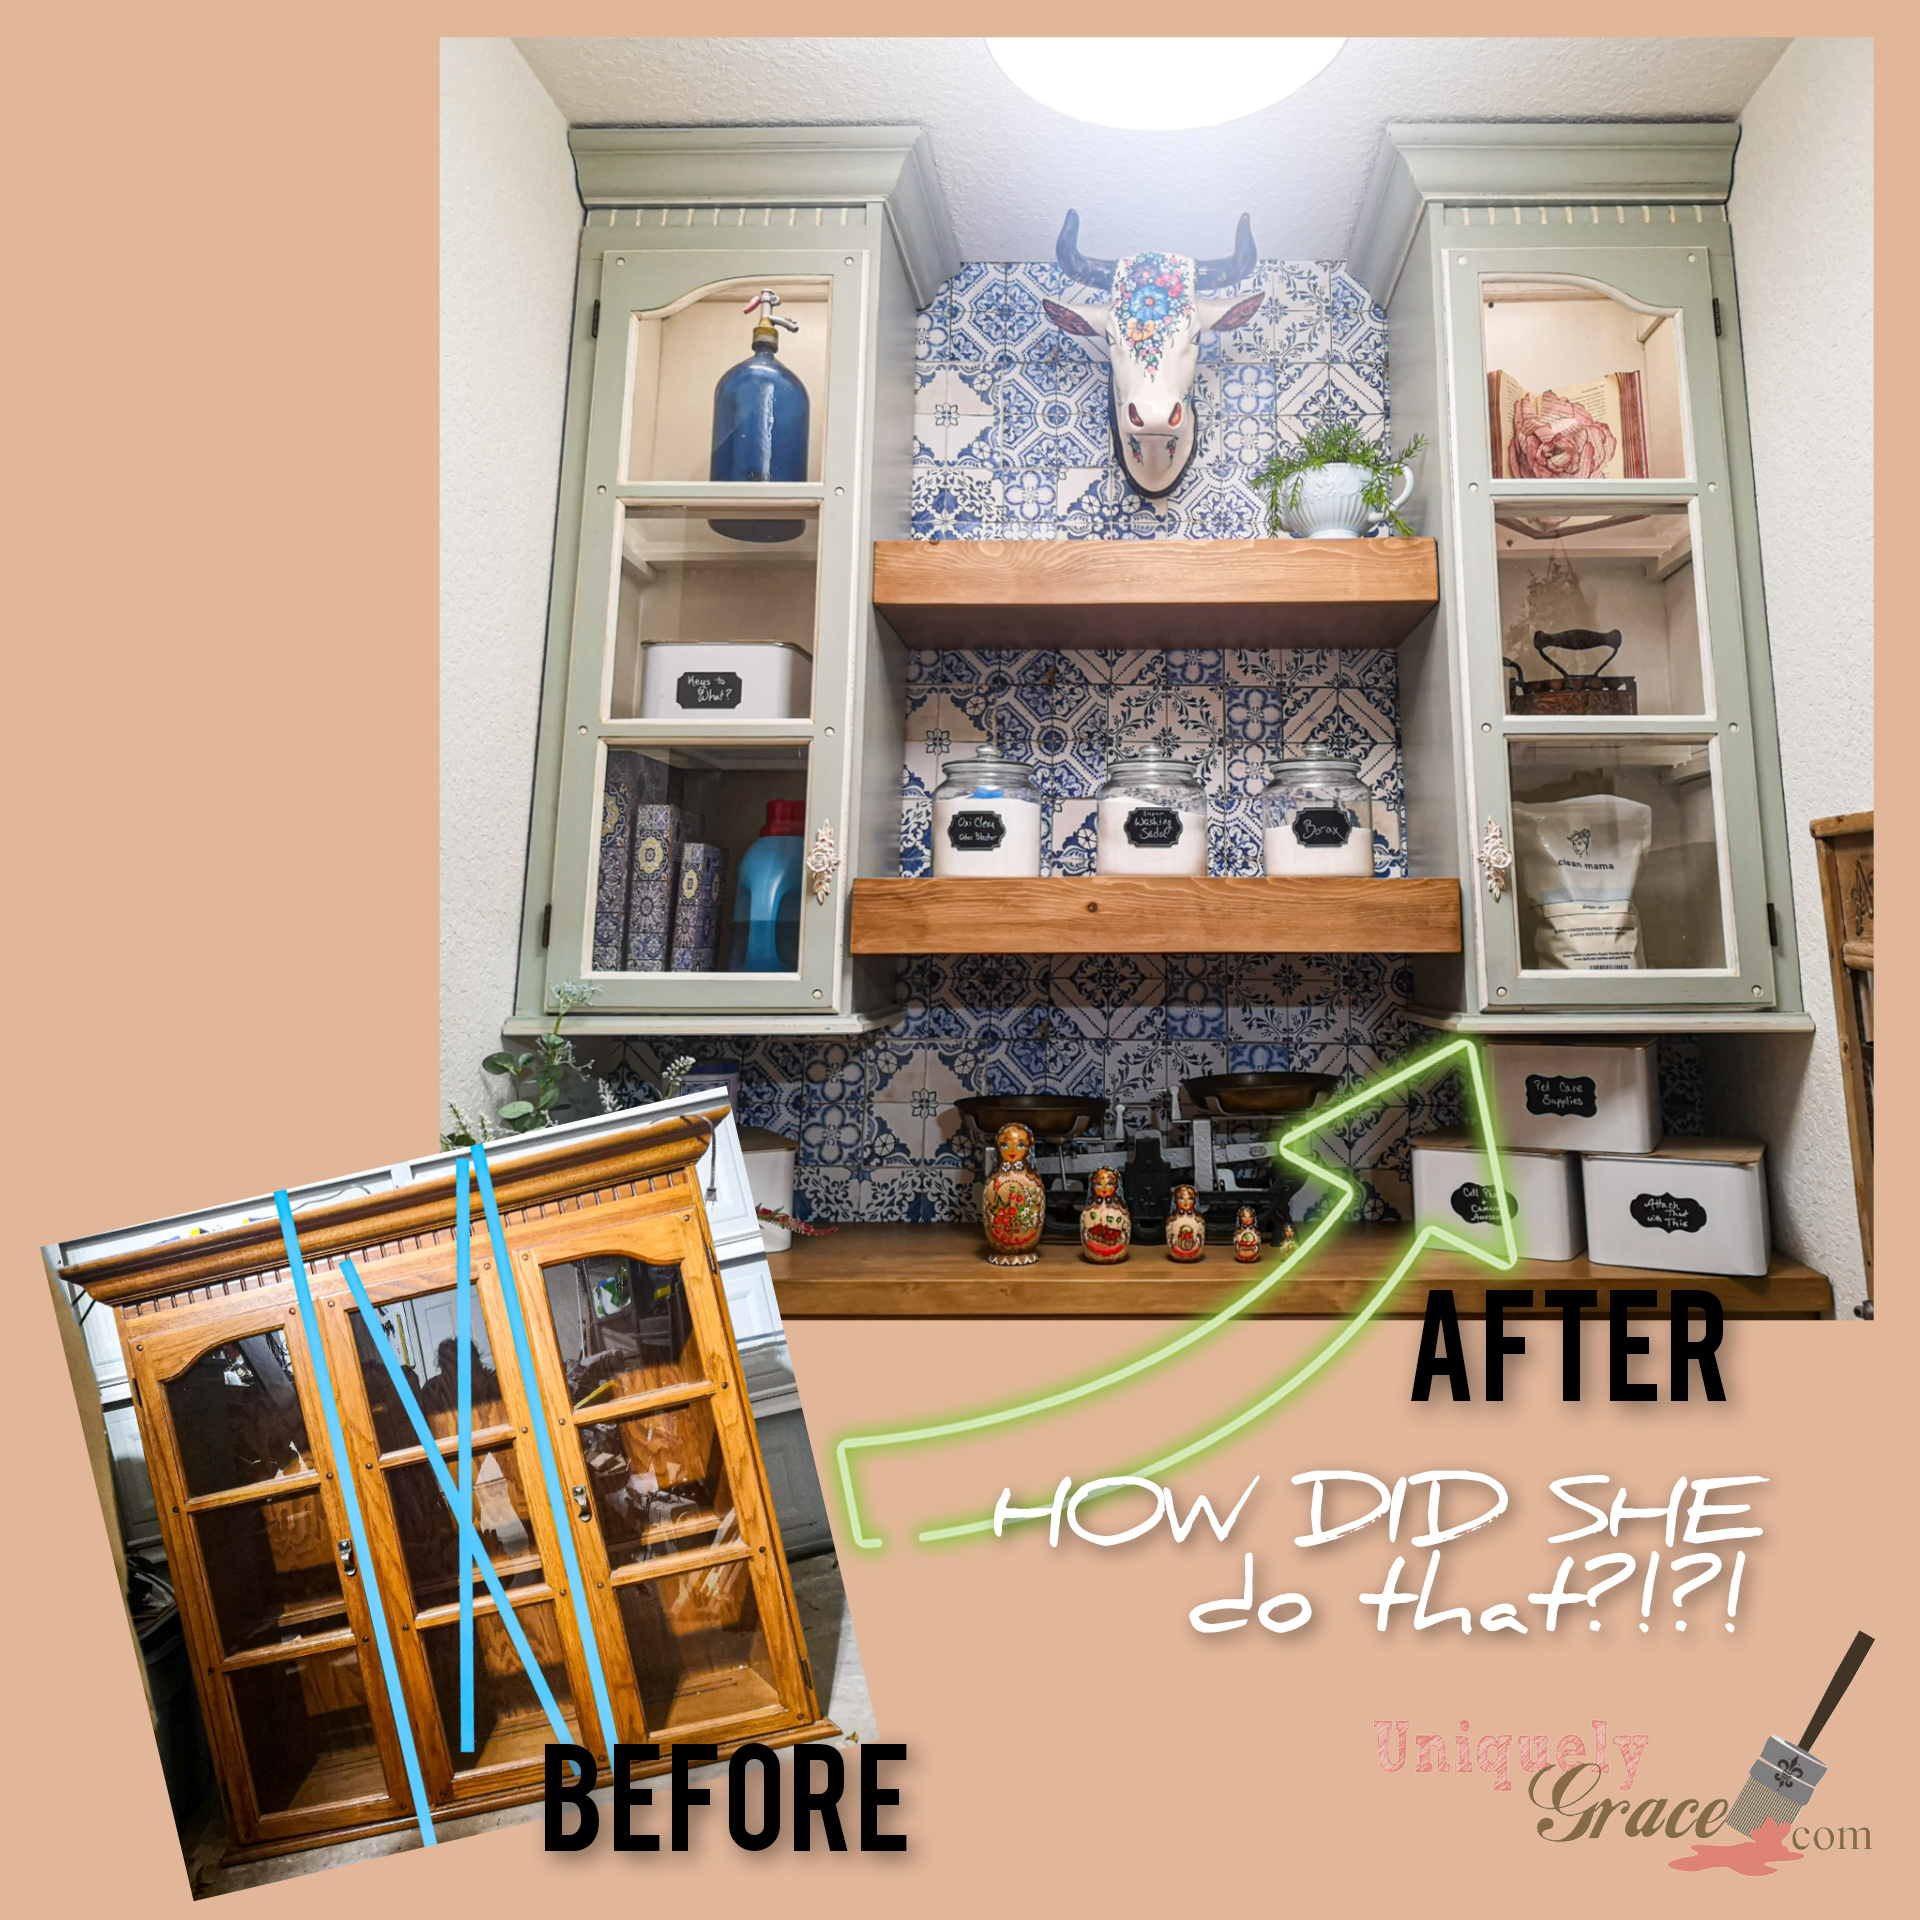
I am so excited you are here and interested in me sharing with you 7 of my favorite ways to update and upgrade your tired furniture. I am talking down right changing the look of your piece! It can be as simple as #5 HARDWARE or as inexpensive as #2 DISTRESSING. No matter what option you combinations of options you choose from this list I am sure you will love the result if you follow your heart and possibly a design inspiration photo from Pinterest! I have a ton of albums pinned up for inspiration for you to take a look!
Paint:
Color!!! No matter if you are cleaning it up with a fresh white or adding a big bold color or a fun pattern with stripes… paint is a great way to refresh your piece and completely change the look of your furniture. Here the the top three tips I have for furniture painting!
-
-
- Start with a clean surface: This is a must! Skip this and expect all your hard work to scratch and peel away! So before you even begin painting, clean your piece with a mix of 50/50 water and white vinegar with a few drops of the original blue Dawn dish soap. Wipe down the surface and rinse with a clean rag and water. Once dry will any cracks or dents with wood filler and once dry then sand down with a 220 grit sand paper to scuff up the surface, giving he paint something to grip onto and giving the paint a nice smooth surface.
- Not all paints are created equal! You get what you pay for! Remember furniture gets way more traffic, touching items pushed across the surface and simple daily ware and tear that walls don’t’ get so make sure you are using paint specific for the high traffic furniture. Use a paint brush or high density roller to apply the paint you have chosen. If your paint doesn’t include a primer then make sure to use one. Always follow the manufacturer’s instructions they typically have a channel on YouTube for demos. That is a great place to start with a specific product.
- One coat of paint is never enough. Many highly pigmented paints are perfect with two coats. If you choose a lower quality paint you can be stuck painting many coats and creating a miserable experience. Time is money… typically the more you pay for quality paint the less time you spend actually painting. To achieve a supper smooth finish lightly sand between coats with a clean 220 grit sand paper, remember to clean off the dust after this step with a dry or slightly damp cloth and a light touch. Make sure to allow each coat to dry completely before applying the next one.
-

Distressing:
Looking for an old world look? How about rustic? or possibly just a simple soft vintage flair for your piece. Distressing a piece of furniture can aal these things depending on how much or how little you distress your item. You can achieve this by using many different tools: sand paper, a scraper, a wire brush, steal wool or even a wet rag if you are using chalk or clay based paints. This does not need to be labor intensive but it must be intentional if you are going to get a successful and convincing “aged look”. Here are my three tips about distressing.
- Chalk paint, Milk paint and clay based paints are all fantastic types of paint for this distressing technique. This is a great way to update your furniture by first painting then using the tools listed below to gently remove the paint by rubbing and scraping it off in areas that are normally worn with the way the piece is naturally used. These types of paints give you great control while distressing as well as ease of fixing it if you over distress. It’s quite forgivable.
- The Tools you will need can be common in the refinishers tool box. Some of these tools included: Sand paper, a wet microfiber cloth, a wire brushes, a hammer or heavy chain and even bird shot for those of you who love to hunt. Bird shot can replicate the wood worm holes that are found in older antiques. The sand paper can create regular wear and tear, the hammer or heavy chain can create dents and dings and a wire brush can help replicate scratches or bring out the harder parts of the wood grain while stripping away the softer ones. The wet microfiber cloth with create a softer and gradual wearing down effect than simply sanding.
- Different distressing techniques can be used such as wet sanding, sanding, charring and more. The type of technique will determine the tools you use and will definitely change the look from one technique to the next. Sometimes a combination of techniques are need to achieve the look you want.
![]()
Embellishing:
This section really needs it’s own blog post so here I am just going to share with you some things you can do to embellish with an additional product your piece over the paint to give it a higher quality and higher perceived if reselling.
- Stenciling
- Transfers
- Gold Gilding/Leafing
- Paint inlays
- Stamping
- Epoxy Molds
Upholstery:
I am no expert on this topic as I only do simple dining chairs but this is a fantastic way to add some pops of color or texture to a piece that has a place for fabric. I 100% think you should take the time to learn this inside and out for tips and tricks before diving into this type of project. It can be complicated and need more specific types of tools. That being said it is 10000% worth the reward to totally transform and update your furniture with Upholstery!
You can even take the plunge and PAINT the current upholstery if it is in great shape just outdated! Here is a video of one of my favorite fabric painting projects!
Hardware:
Oh how I love replacing the hardware will update your furniture quick and easy! It is an expensive option sometimes but if you are missing some it is well worth the investment. Here are my top tips about how to choose hardware:
- Take a moment to study the style of your furniture piece. Your Hardware should compliment this style and accent it rather than clash with it. So be true to the piece’s structure and “bones”.
- Make sure your hardware is good quality… no use putting all that work into a piece and then putting flimsy hardware on it.
- The functionality of the hardware is also of import. You need to consider this when choosing the durability of the hardware and how often this piece will be used pulled on and open and closed.
- Size and scale of the piece are also something to consider. If your piece is big and bulky a dainty and tiny piece of hardware will hardly be noticeable. Make sure your hardware is fitting for the scale and size of your furniture.

Modifying the shape:
Sometimes the shape of the furniture does not suit the space or the aesthetic you are trying to achieve. In these cases, you can remove or add parts of the furniture to change the shape.
- This one takes a lot of planning! You want to measure 3x then cut, you want to predesign it! You need to have an idea of how you want to alter this piece. It’s sooo much fun and the results are amazing but it defiantly not for those who like to wing it.
- You want to be aware of the structural integrity of the piece as you disassemble or cut into parts of the piece.
- Make sure to keep the alterations withing a similar style of the original piece. You want to work with it’s original character and design not against it.
- Use tools for wood working for nice precise cuts and adjustments.
- It takes practice to master this option but when you do your work will wow your customers, friends and family.
Add-ons:
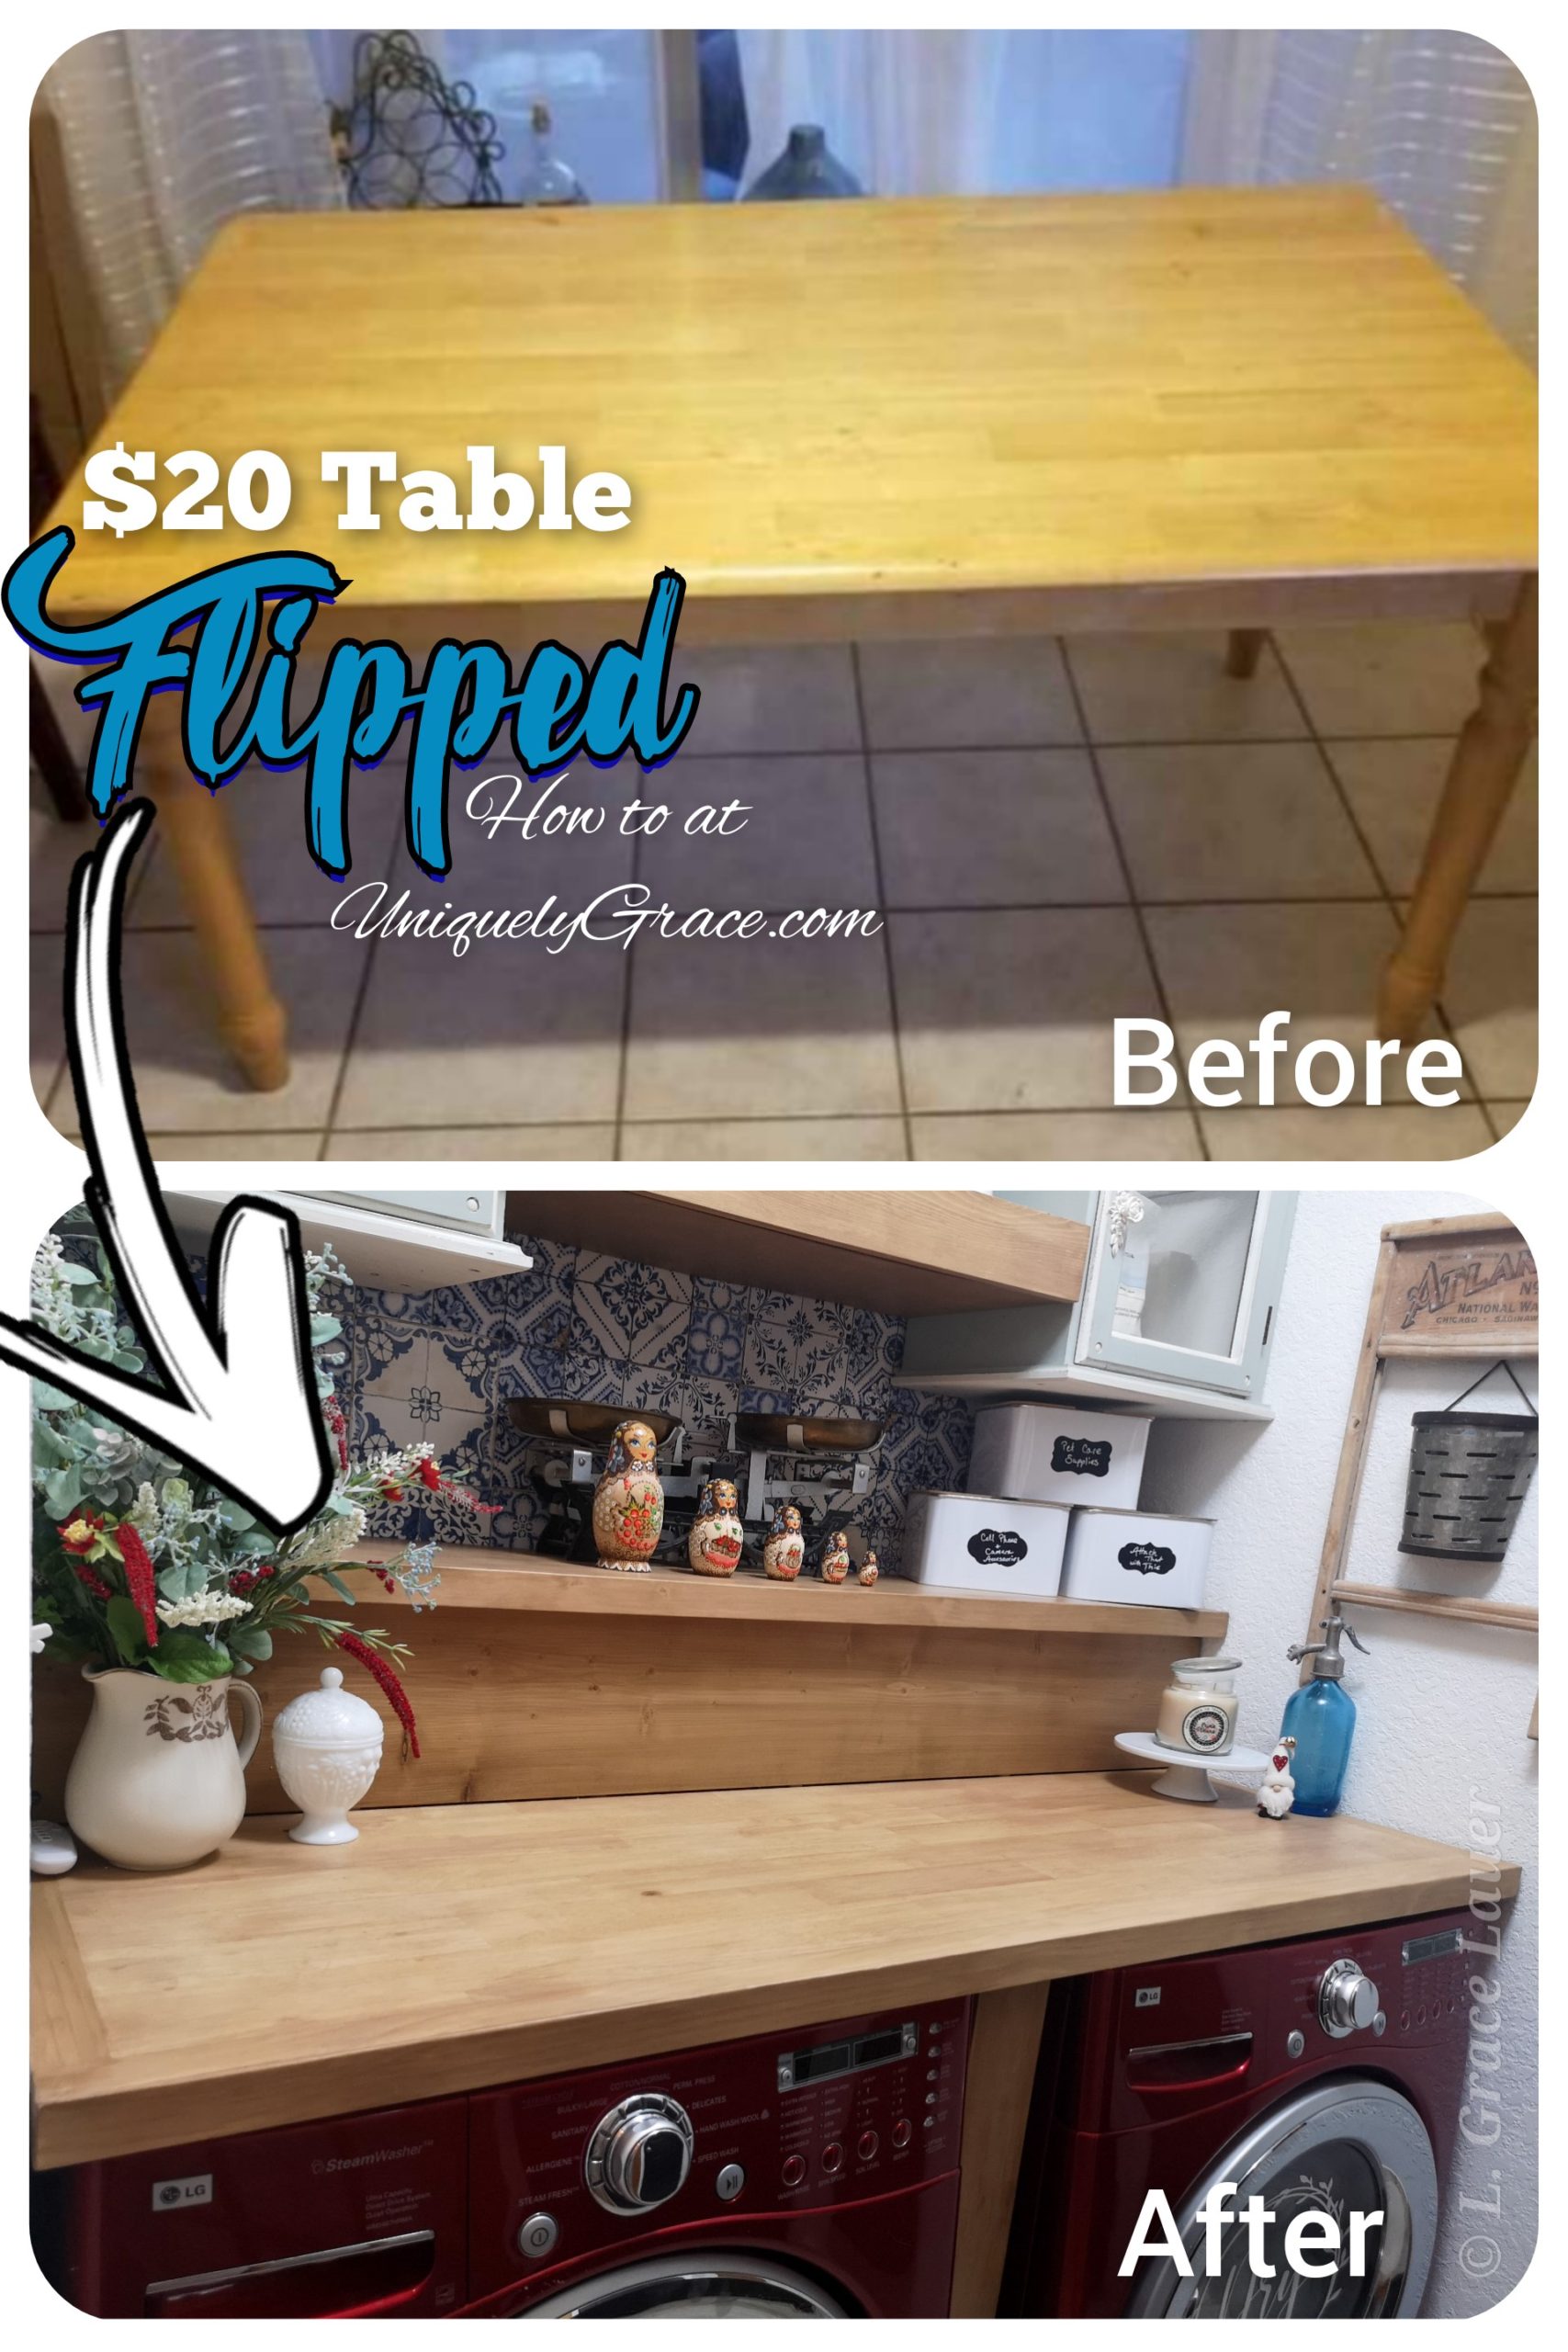
Last but not least you can update your furniture with some well planned addons. The types of features you can add-on are but not limited to: legs, shelving, wheels, drawers, mirrors etc. You want your addons to have a purpose… they need to be functional and beautiful to be successful.
This project example is of a table I turned into a laundry folding counter. I added on the thicker edging to make it look like a deep butcher block as well as the riser plank in the back to hide and also allow ease of access to the mechanics.
Always think outside the box when choosing to update your furniture! Make it unique and enjoyable. If you fail… try a gain and be grateful for the learning experience, it’s all part of the process. Remember always, Safety first!
I host a Facebook group I am excited to invite you to join, Furniture Refinishing Academy. This group is a place where like-minded individuals can come together to discuss and share tips and tricks for creating a successful furniture flipping business.
There are free classes within the group, discussions about all kinds of topics, helping boost your marketplace sales and much, much more!
All the Best for Your Success,
L. Grace Lauer
The Furniture Refinishing Academy Team