So you need to know how to refresh tired antiques easily? Well, you’re in luck and reading the right blog. This isn’t a post about using one and done products. We will be revitalizing an antique tea table that needs to be able to stunningly shine in the modern world without losing it’s vintage, hand carved charm.
We have all been there, at a yard sale, an antique store, a barn sale or online marketplace and there it is… a beautifully structured early 20th century mahogany table. The polyurethane is discolored and chipping. The beautiful piece whispers in your mind…
“Look at my lovely lines & curves, my strong solid mahogany legs and the delicately designed veneer top. Please make me lovely again!”
So you snatch it up for a steal of a price and bring it home with you reassuring yourself that you can make it beautiful once again… but now what? It’s been sitting in your project pile for weeks and painting it all one color will just deafen the hand carved details that were longing to sing again. Sound familiar?
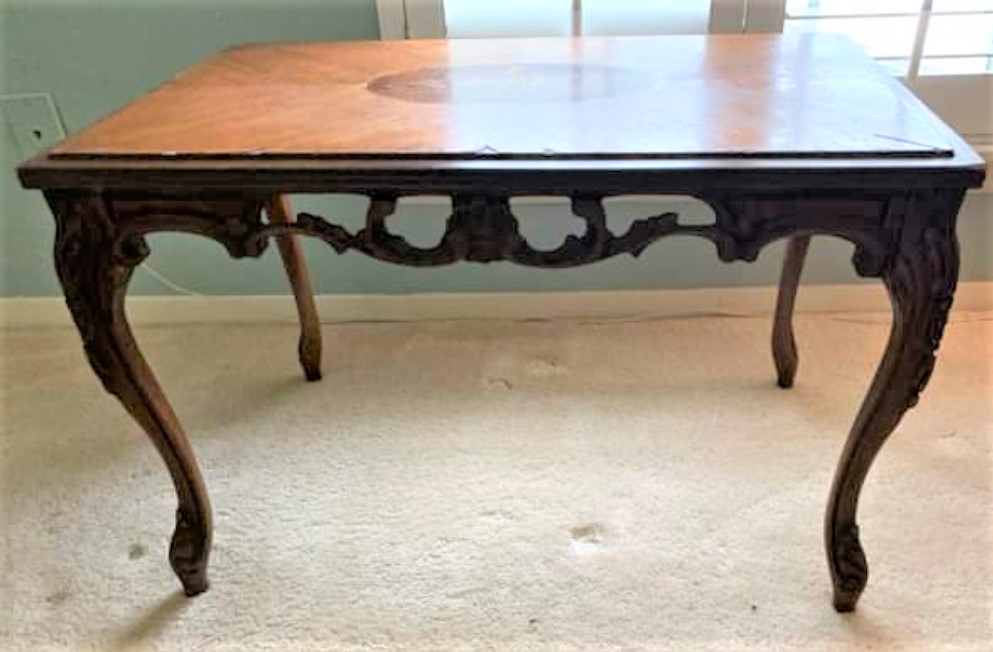
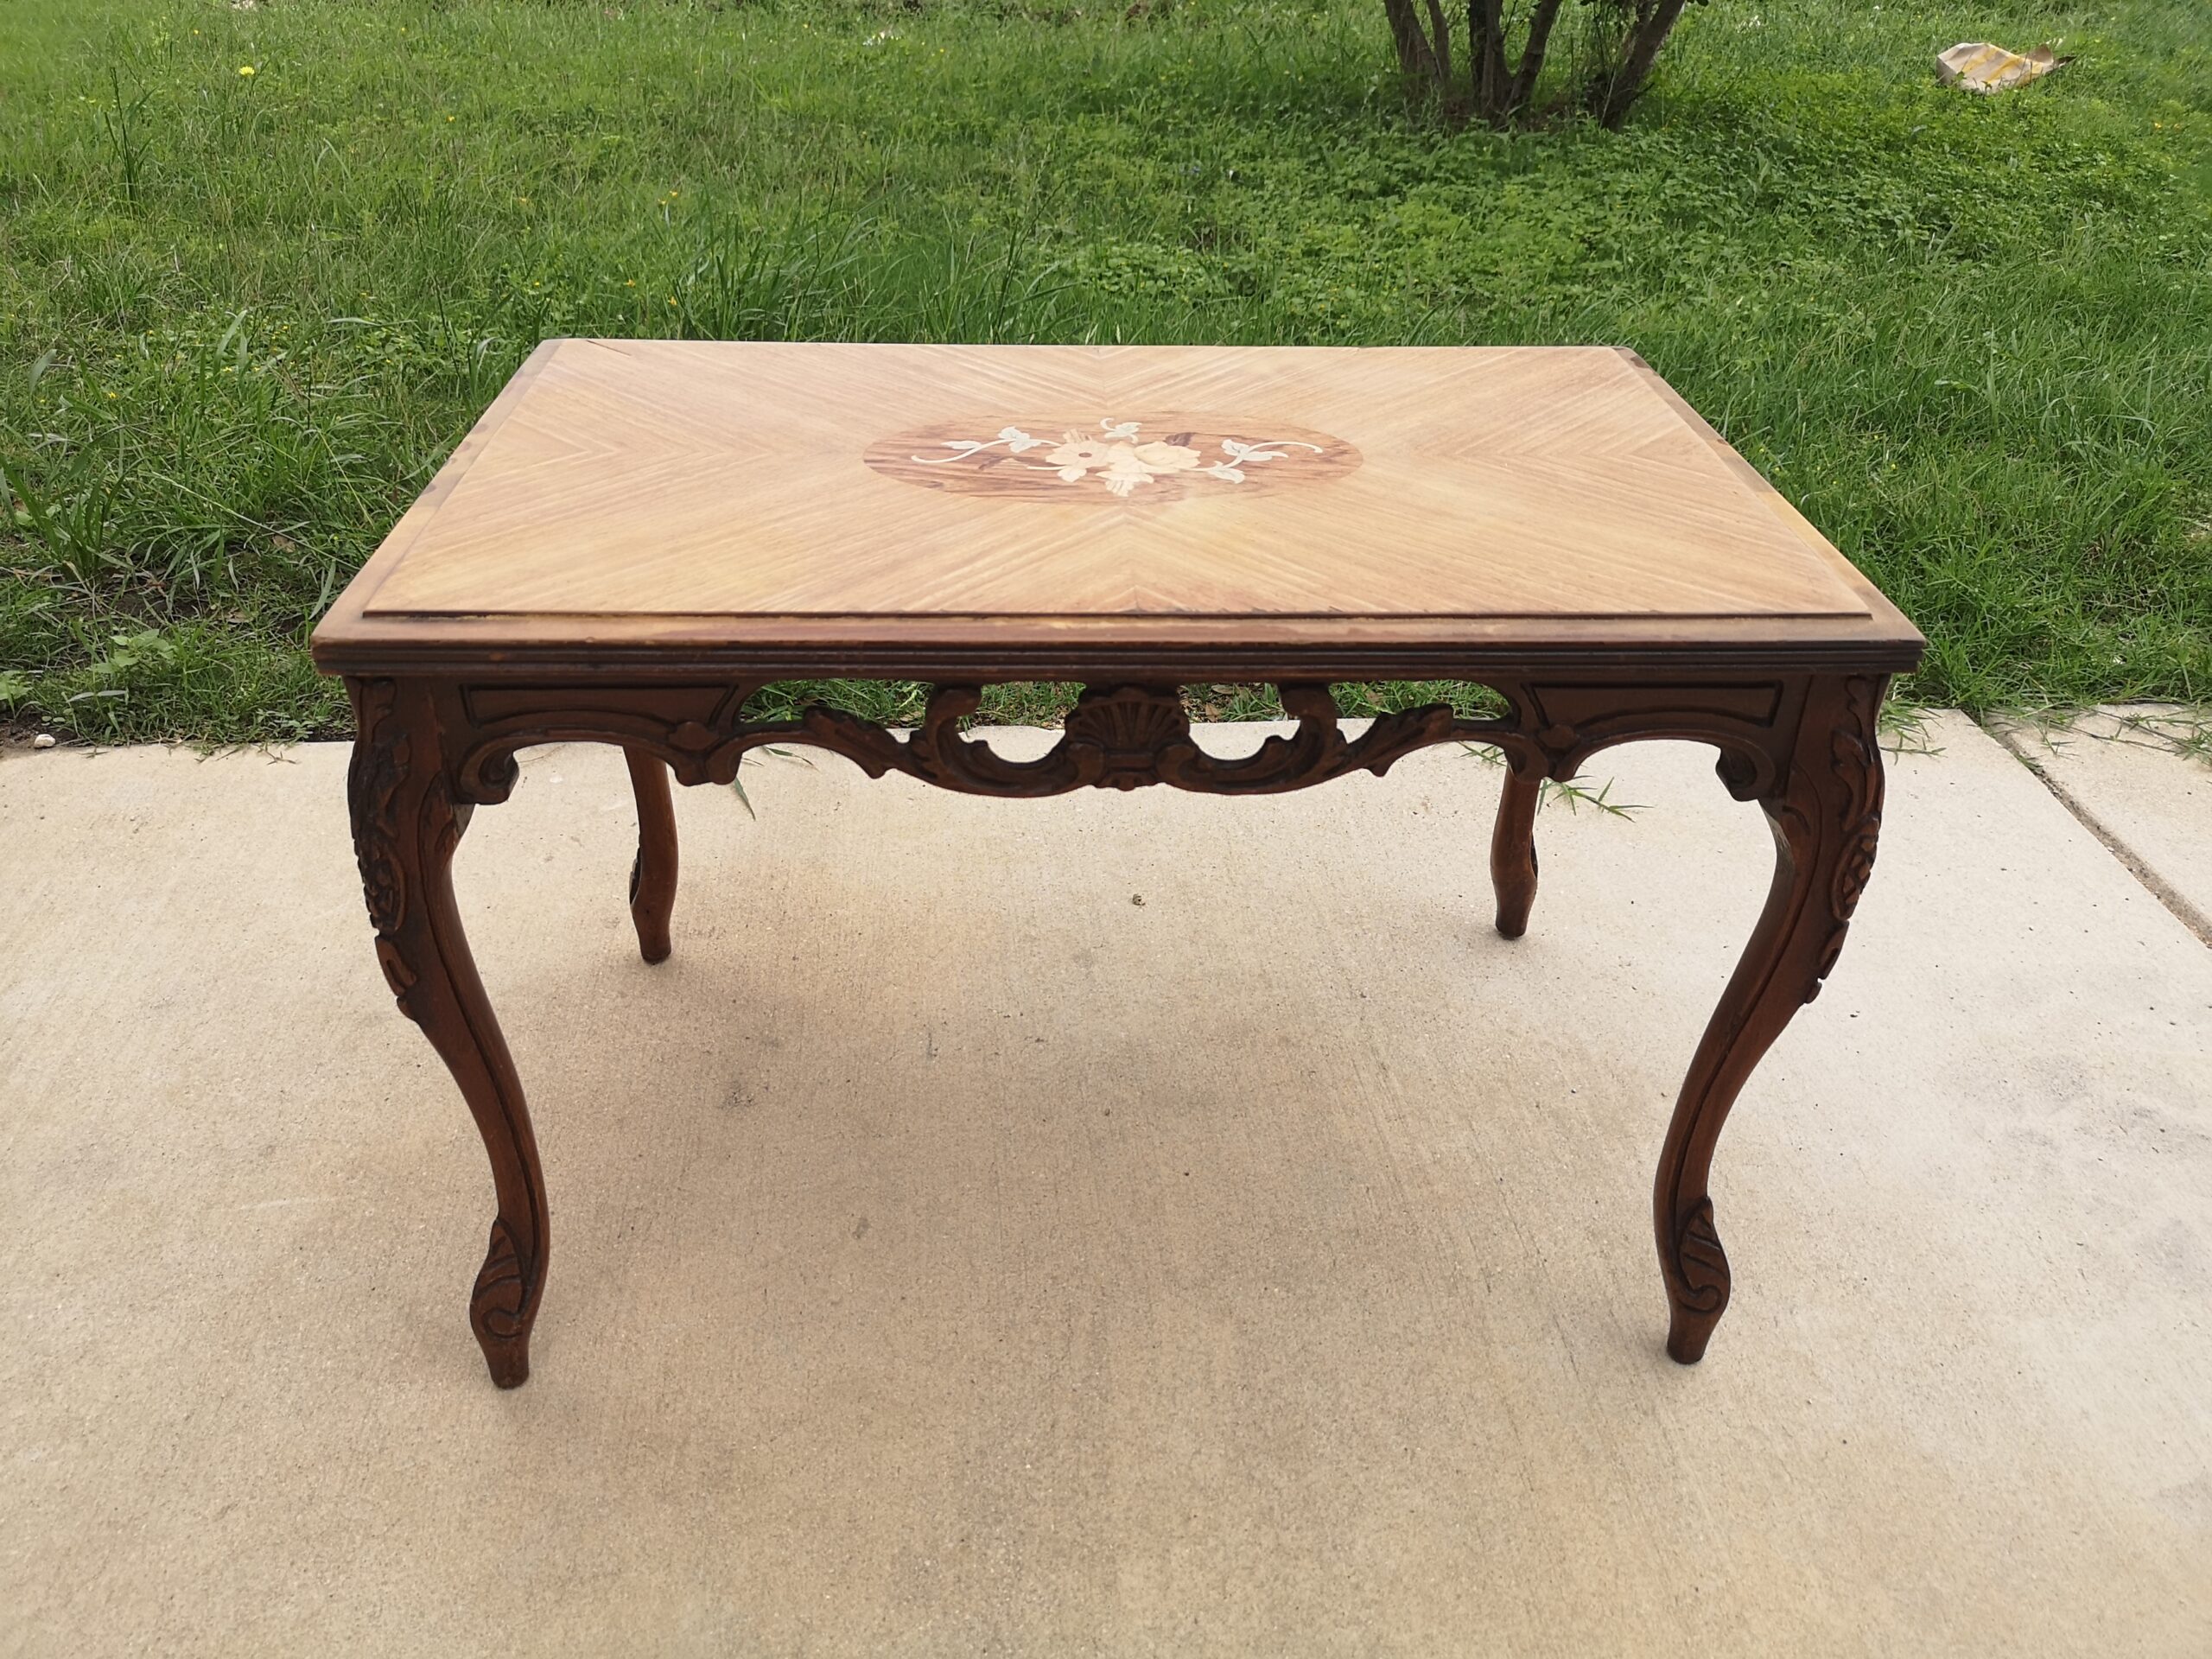
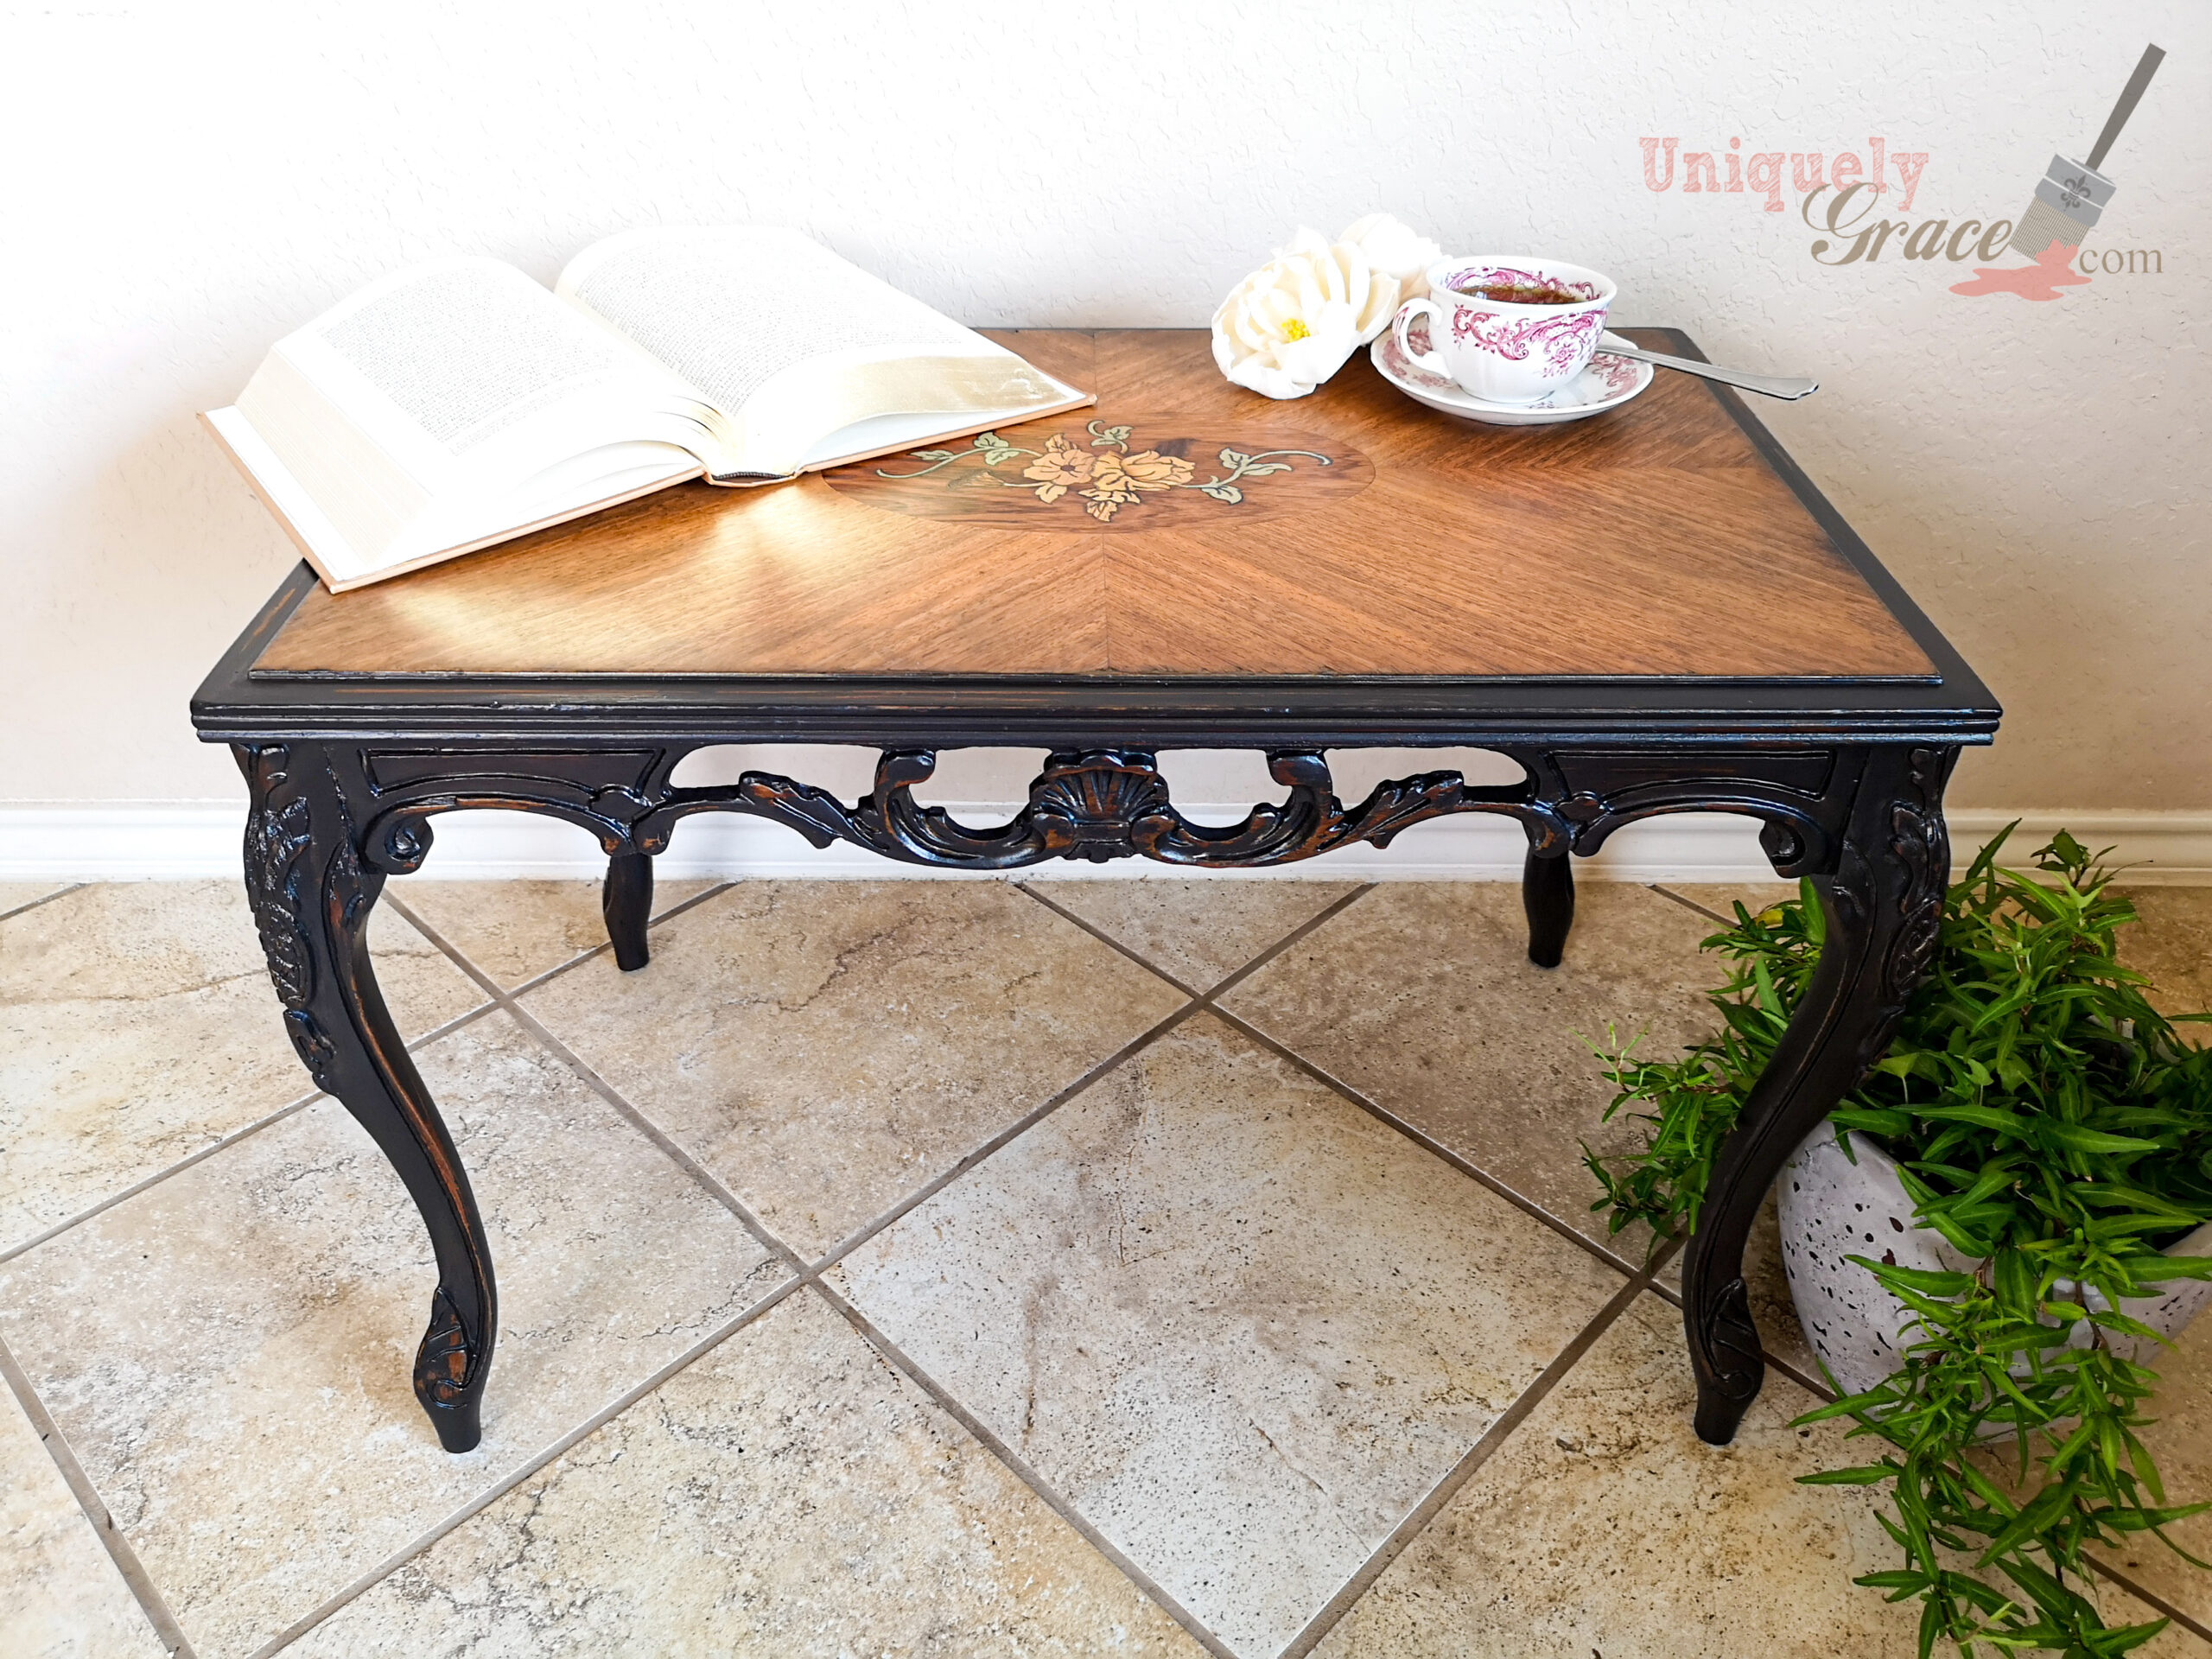
I found this lovely beauty as an add-on purchase from a lady I was buying a China cabine from. I had my son load it up without my close inspection, I know, I know I should have inspected it. This delicate table had visible chips in the veneer top, cracked hand carved details and discolored peeling polyurethane.
That didn’t matter, I was excited to quickly flip this beauty into modern life with all the antique charm she possessed already. Can you see it?
Do you have a table from this era? If you do but don’t know how to make it not look outdated, tired and underwhelming. You are in the right place!
5 Steps to Refresh Tired Antiques Easily
Step 1 – Remove the Tired Repair work and Sanding
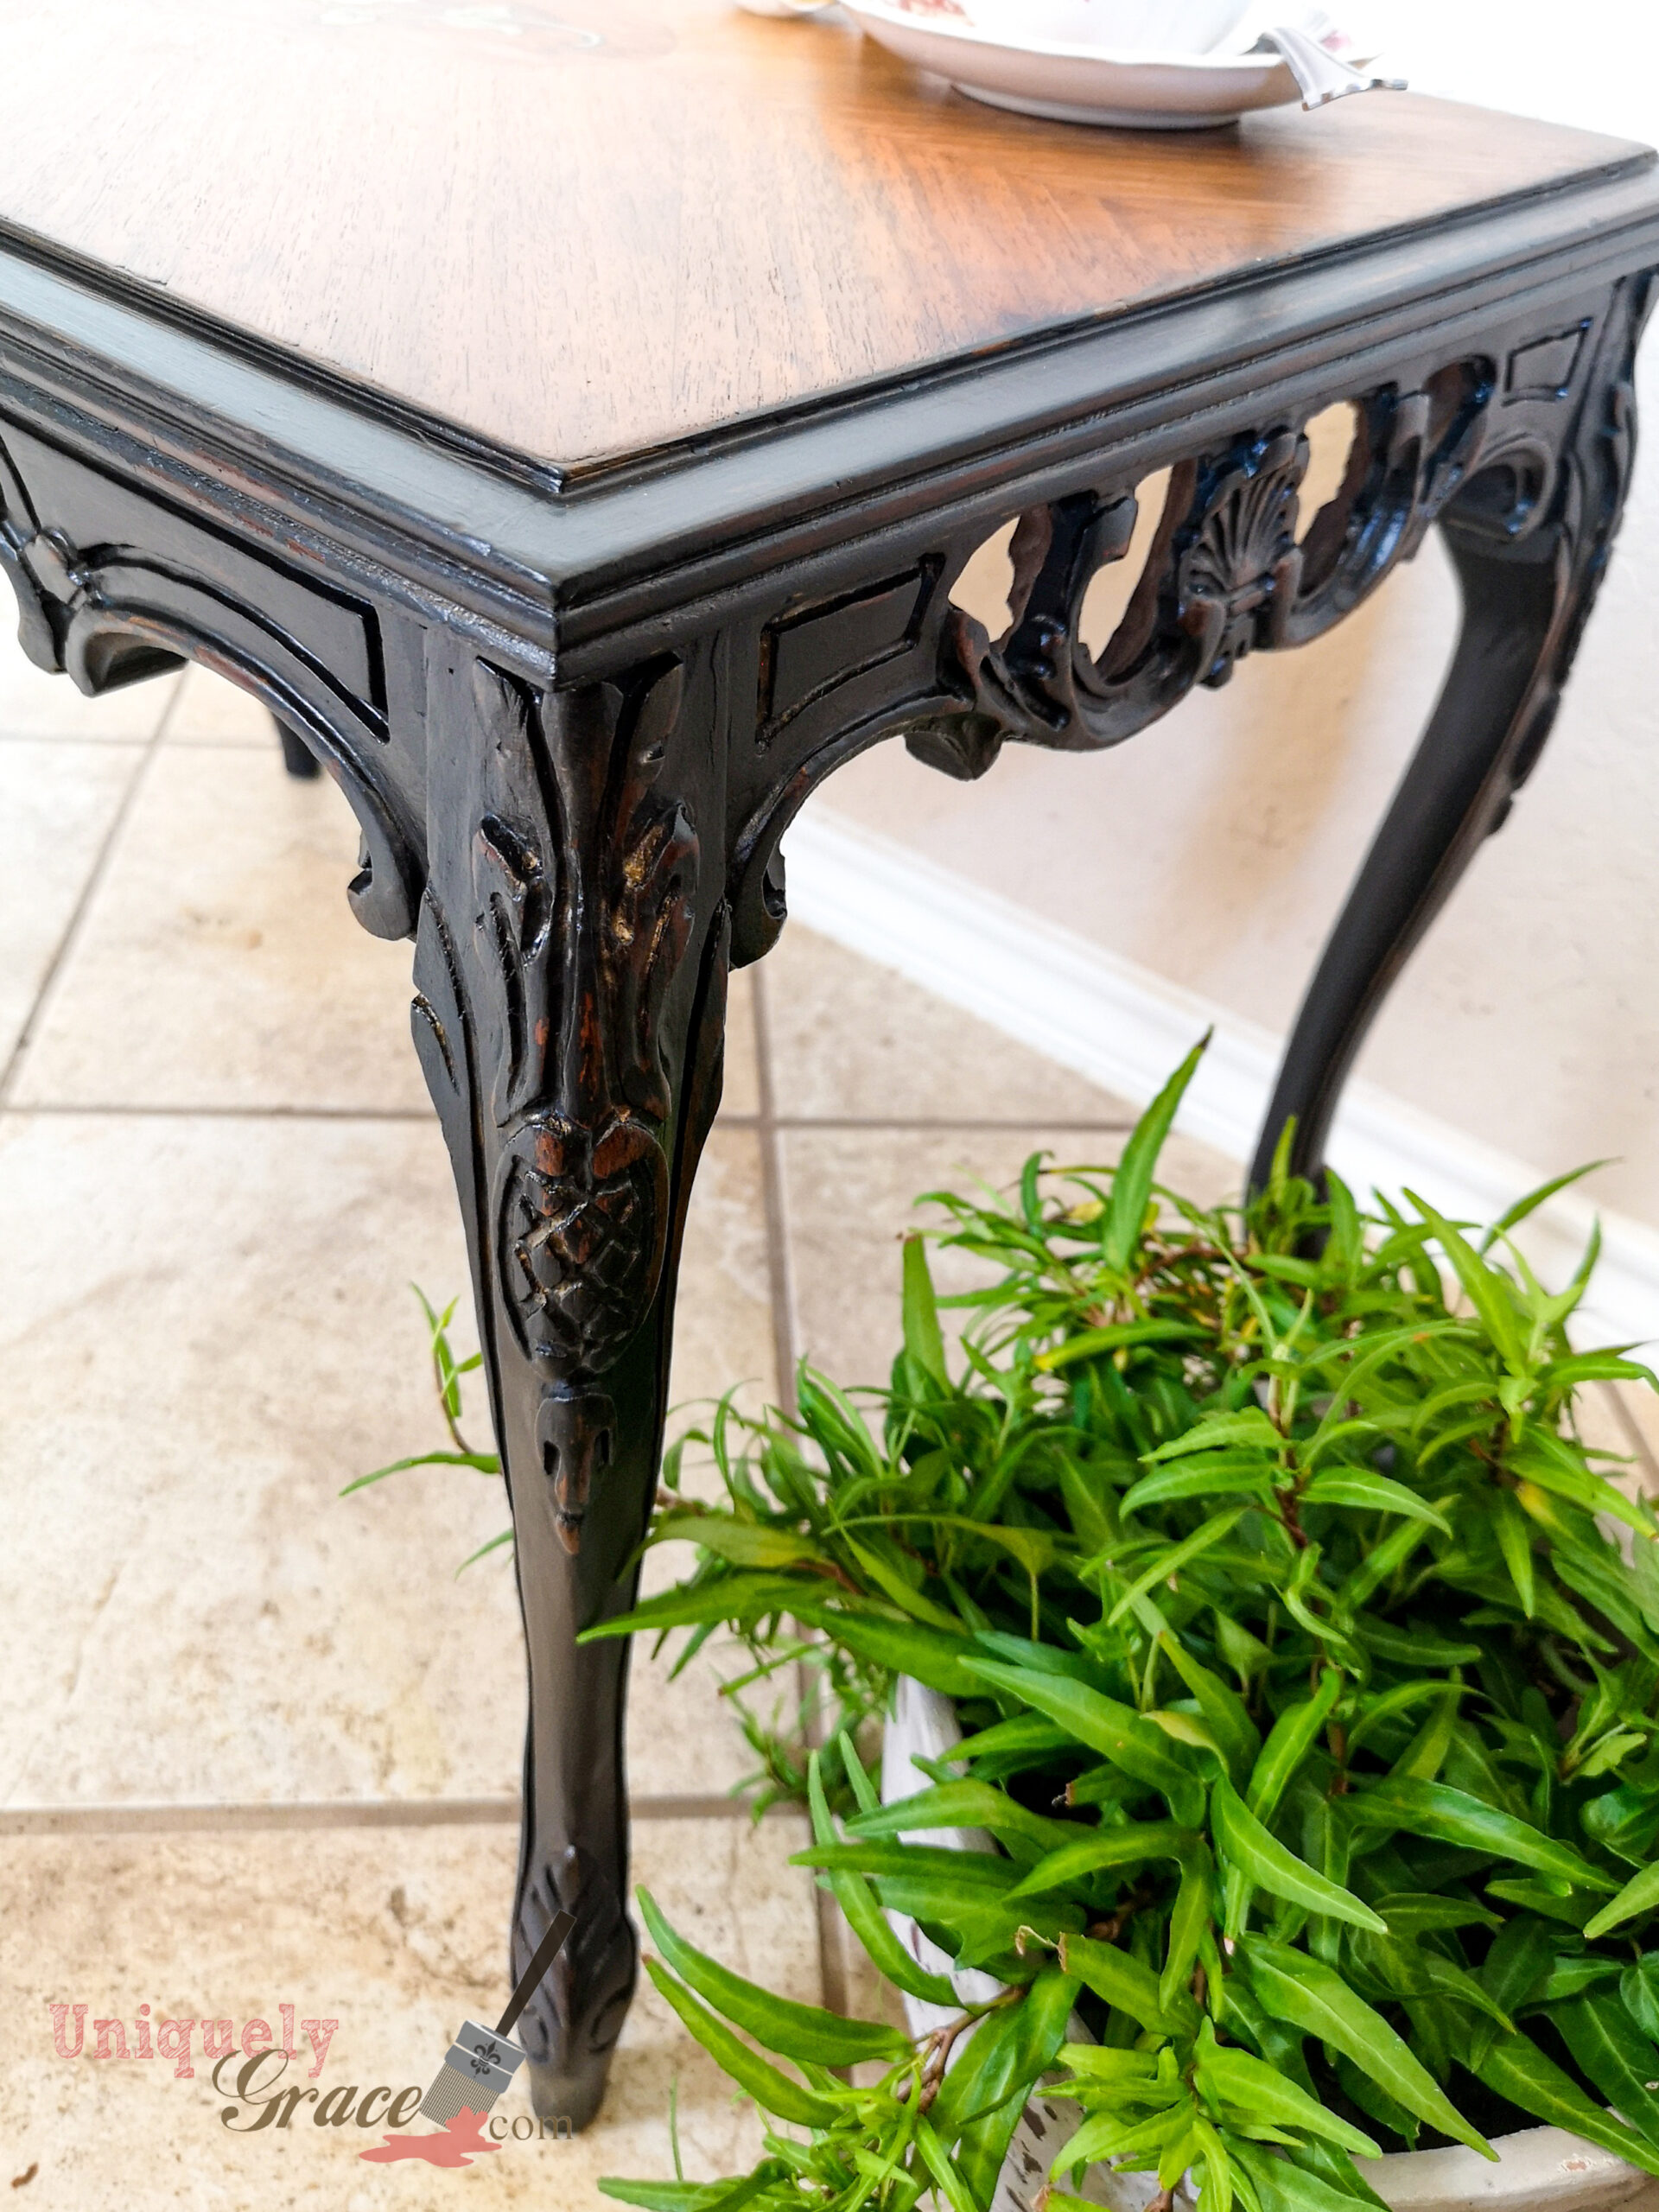
First and foremost you want to repair the piece. If it has a wobbly leg, tighten the screws or if the screw won’t tighten remove it and place a toothpick or two inside the hole and reinsert the screw till it is nice and taught. My piece had some broken detail across the table top skirting on one side. After my laziness of not inspecting the piece, all the parts were still there just broken, so some simple wood glue and clamps were needed, thank goodness! I meticulously made sure that there were no glue drips or bumps from the glue squishing out of the repaired joints. I decided I would accent the peeling veneer along the edges with antique gold paint versus trying to repair them.
Sanding is something with these pieces that must be done. I gently sanded the poly off the veneer with my orbital sander and a fine grit paper (120-220) to prevent sanding through the thin layer of veneer.
Pro Tip: Do not push down on your sander in any way. Let the paper and movement of the device do the work for you. Just gently guide it to where it needs to work.
After the top was smooth and I could see the floral design clearly I moved on to sanding off any peeling polyurethane that was happening on the trim and body of the piece. This can be a little time consuming as it is by hand. You don’t need to remove the entire surface, just the chipping parts that are failing to adhere still to the wood.
Step 2 – Cleaning is very easy and necessary
When you want to refresh tired antiques you always need to clean every inch you wish to refinish. There are years of oils, cleaner and dust repellant residue. My go to cleaner for all my pieces is a 50/50 mixture of white vinegar and water and a small splash of blue dawn dish soap. I scrub the piece till the cleaning solution stops coming up dirty. You will need to rinse it thoroughly with just water and a microfiber cloth. I usually pick my cloths up from the Dollar Tree store, I snag a few of them whenever I find the white ones in stock. Clean and hang on to this cloth as we will use it later.
Pro Tip: If your water is reddish looking that is the mahogany stain coming off. It is okay for this to happen just know you will never get your water clear if the stain color is “bleeding”, and yes that is the technical term. I usually let the piece dry overnight just to make sure all the moisture is out of it from the cleaning stage. You will need to seal the piece with a clear water based varnish or shellac sealer if you choose to go with a medium to light paint color, prior to painting.
Step 3 – Painting – This is the refreshing part
Choosing a color. This can be difficult for some so here are a few things to keep in mind. Be true to the piece, to refresh a tired antique easily it needs to be simple. So stick with historic or neutral colors that will compliment the time period or style of the piece. Going bold can be done right but if not done right it will be tacky and unappealing. That is more for the experienced refinisher who knows their way around color and techniques. For this piece I went with Raven from Terra Bella Paint and Finishes. What color are you thinking of choosing? Let me know in the comments.
Now it is time to paint! For these pieces I do choose a different paint brush then I usually use. I have a small round Zibra brush and their triangle corner brush that are my favorites for these types of pieces. These two allow me to get into all the creases and curves of the hand carving details easily. I would highly suggest collecting good quality brushes that you commit to cleaning well every time you use them. These will last you a very long time and give you great coverage. I painted two thin coats of the Raven black. This is my absolutely favorite go-to black shade on the market, you will see why when we are done.
Need some basic painting tips? Check out my how to chalk paint video.
Step 4 – Distressing
Most importantly, in my opinion, when you want to refresh tired antiques easily, stopping at Step 3 is a rookie mistake. These pieces have a story to tell and if you continue to Step 4 you will be eternally grateful that you allowed this piece to tell it’s story. Distressing this piece is where it all comes together.
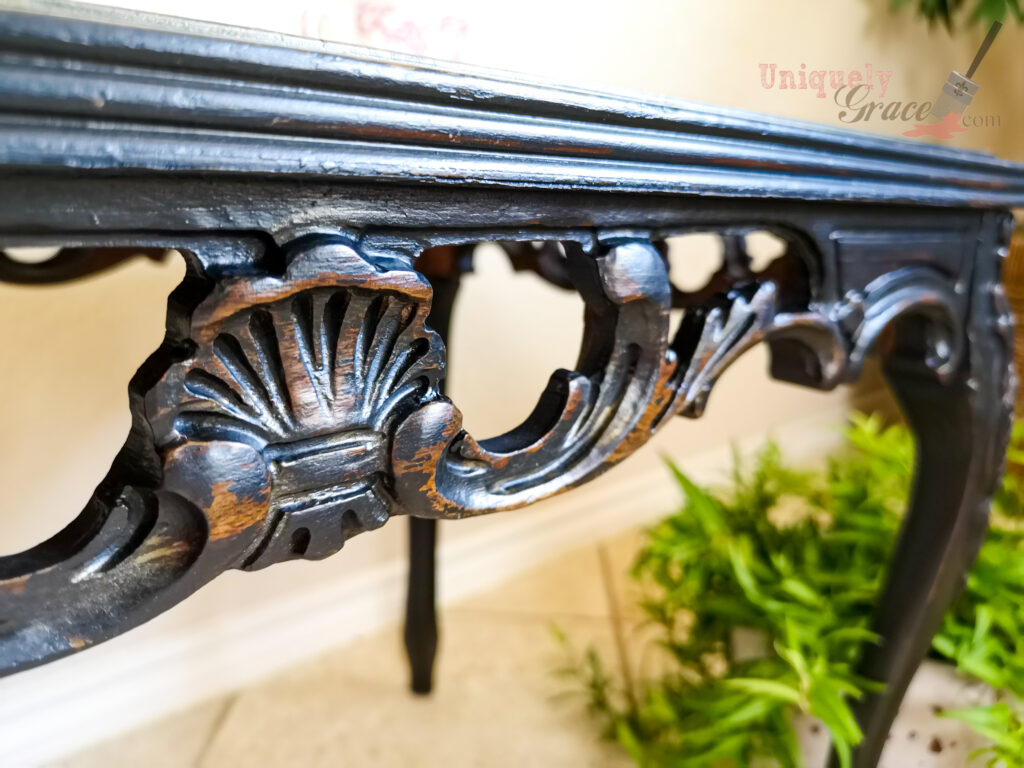
After painting two coats and letting them dry completely. You will need to take your microfiber cloth from earlier, not sandpaper, get it wet and begin to gently rub it over areas that would naturally be distressed from everyday wear and tear. Pay attention to where people would bump it regularly, such as corners or shoes on the bottom of the legs. Higher raised areas in the design would also receive more wear over the last 100 years so let’s show some there too. The left side of this corner is complete, the right side is not.
Pro Tip: If you distress to heavily and take off more than you would have liked to. Simply repaint that section, let it dry and go back over it distressing more lightly.

Step 5 – Sealing
Okay, here is where some people will slap on a clear coat and call it a day. I am a firm believer that you can kick it up a notch and be 100% intentional with everything you do to refinish your pieces.
”Quality is never an accident; it is always the result of high intention, sincere effort, intelligent direction and skillful execution; it represents the wise choice of many alternatives.”
William A. Foster
Sealers are functional but did you know some of them can be mixed with color or tinted? My go to sealer is Liquid Wax by Terra Bella Paints and Finishes, in this case I used the pre-tinted Ebony sealer. When you use a tinted sealer that matches the paint color it softens the color contrast between the mahogany exposed wood and the paint color. This step is SUPER easy and no buffing! Just brush on the sealer, let it dry and add a second coat. Note: On the top I used my Liquid Wax Sheer sealer, which has a lovely sheen in a satin like finish.
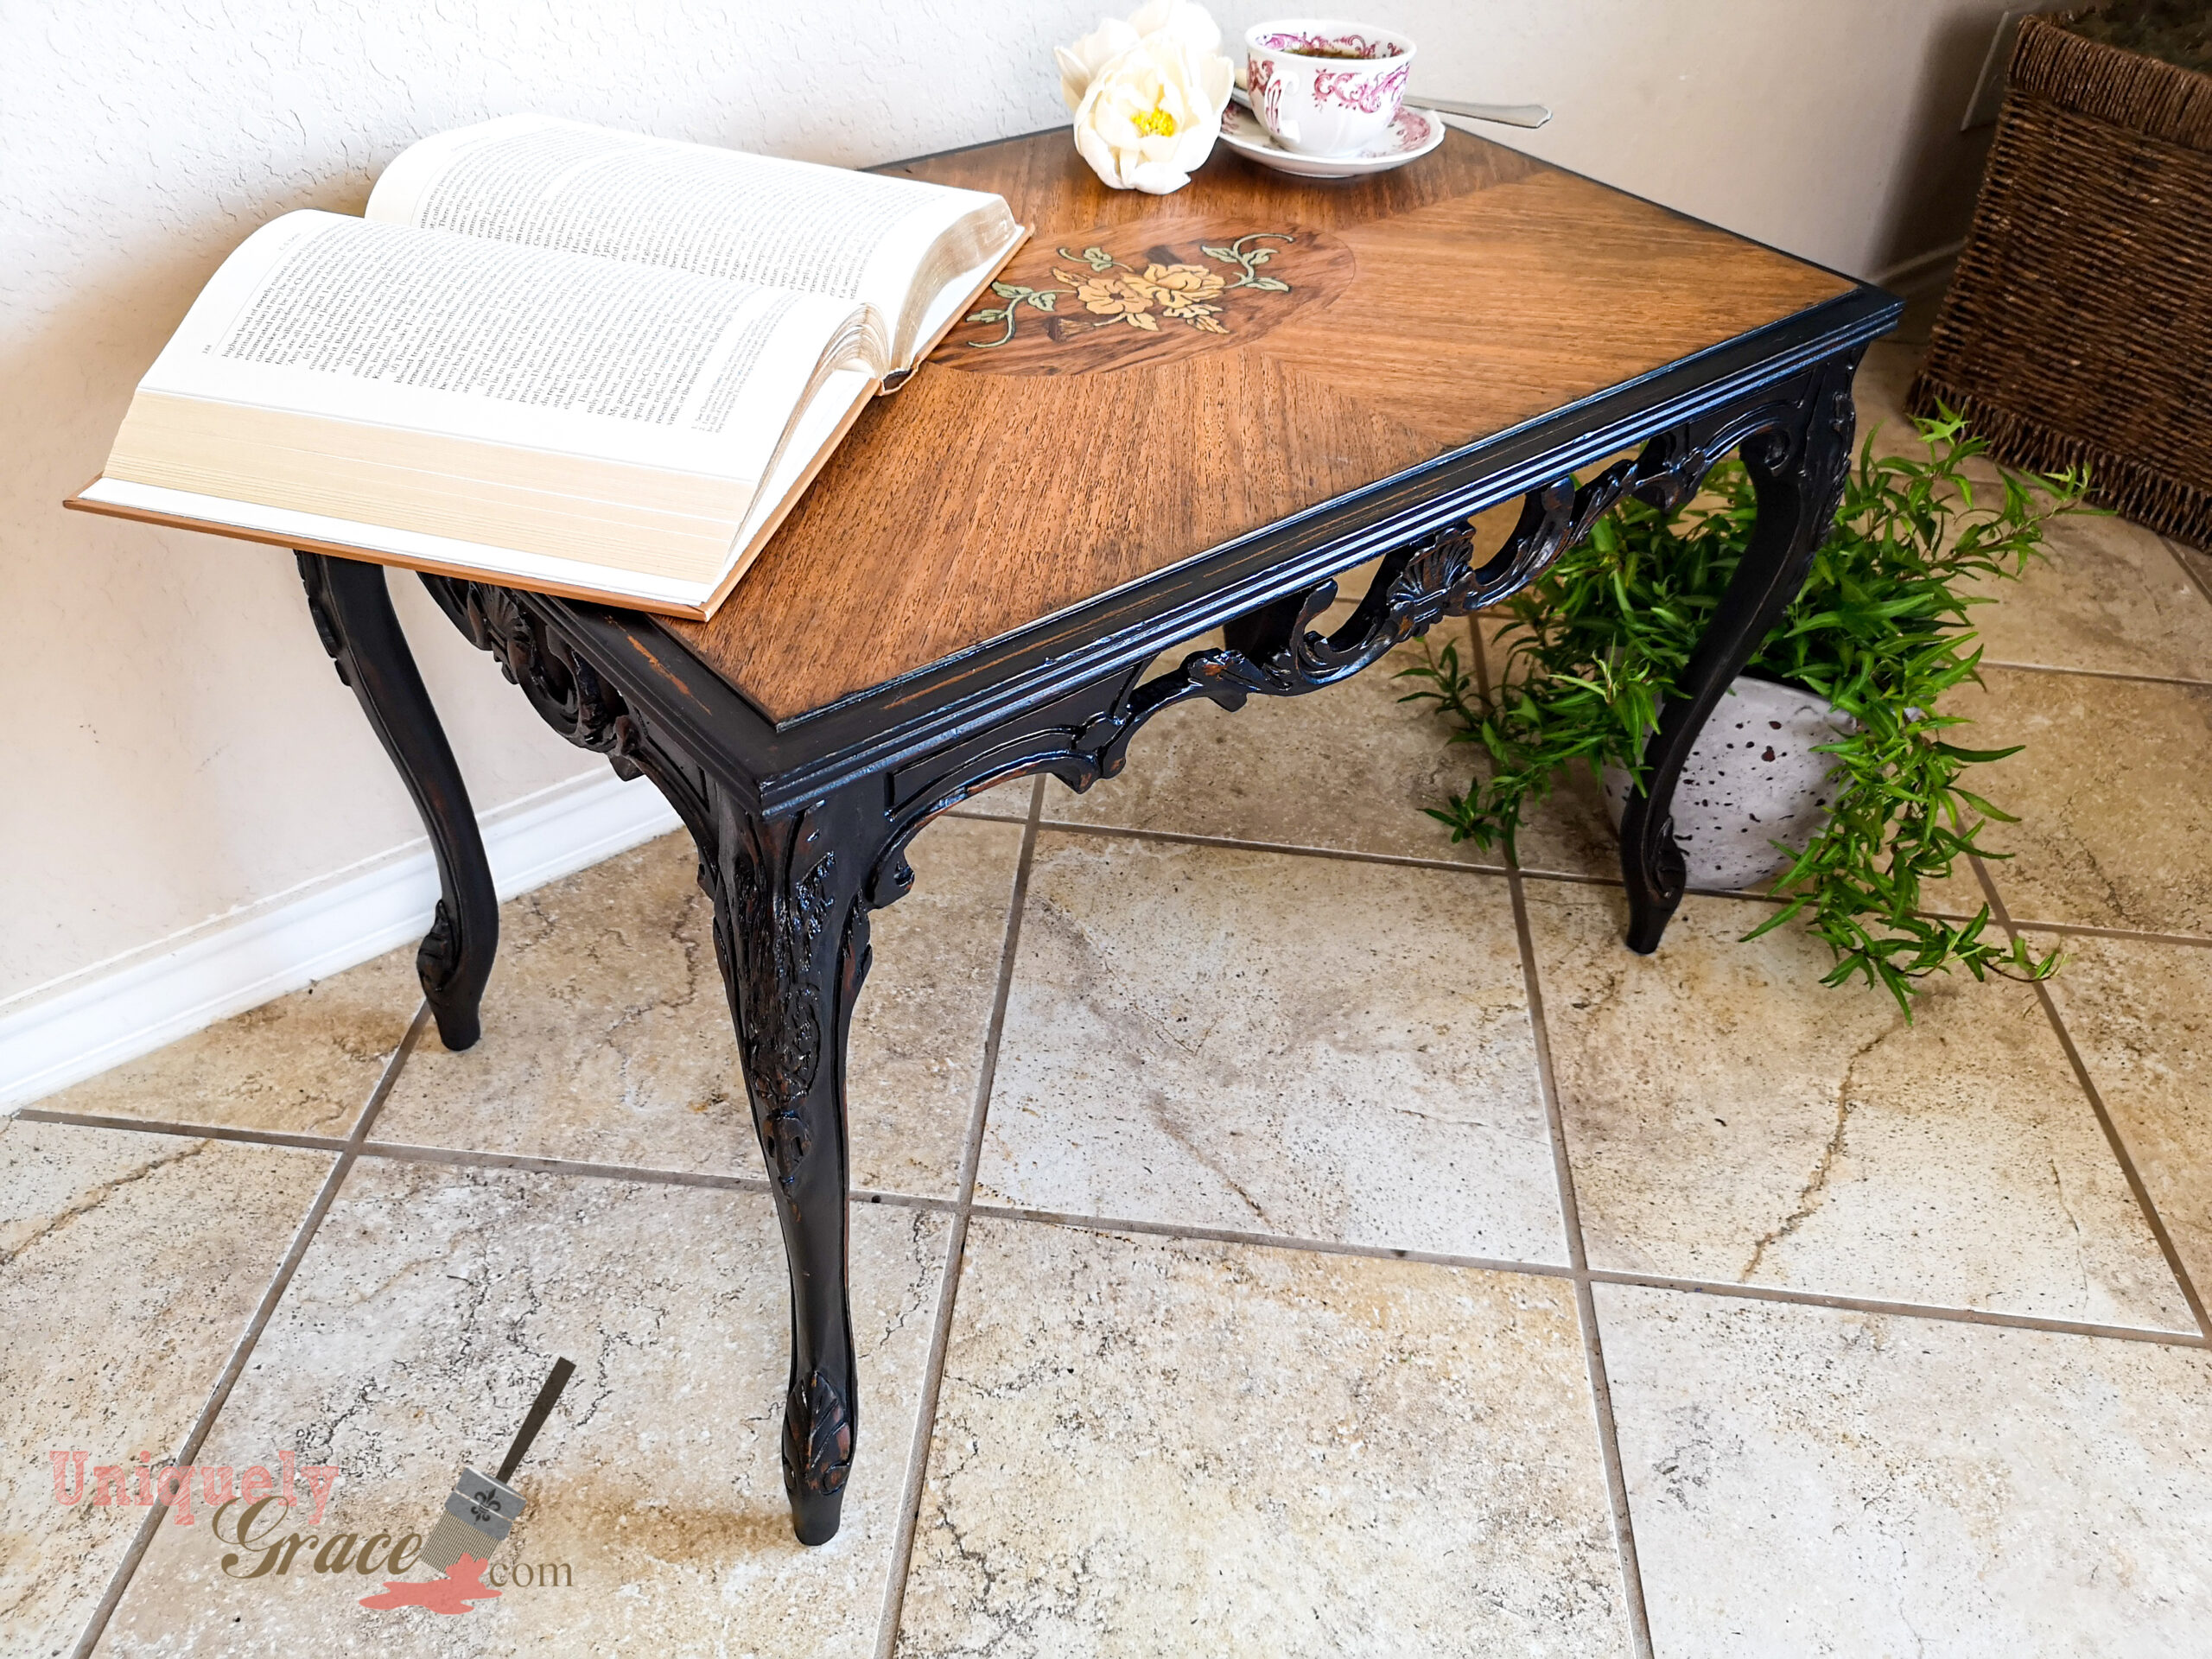


Ta-da!
And that my friends is how you refresh tired antiques easily with only 5 simple steps. Do you have a piece you would like to do this with? I would love to hear from you so please leave a comment below. Please share images of your piece with me on my Instagram and Facebook socials.
You can find this same finish on this Parlor table I did a few years back. It is stunning! Victorian Parlor Table – Show me that inlay baby!
Here is another tea table with trey I simply used a tinted sealer to add depth over the currently good condition of the old finish. Refinishing Wood Tea Tray Table – Terra Bella Paints
Last but not least, this stunning custom finished piece I recently did in a French country blue. Now That’s a Makeover! Stunning French Antique Entryway Table Transformed
Thank you so much for joining me today. I hope that this post has inspired you to refresh your tired antiques… and do it easily. Let me know in the comments if this was helpful for you!