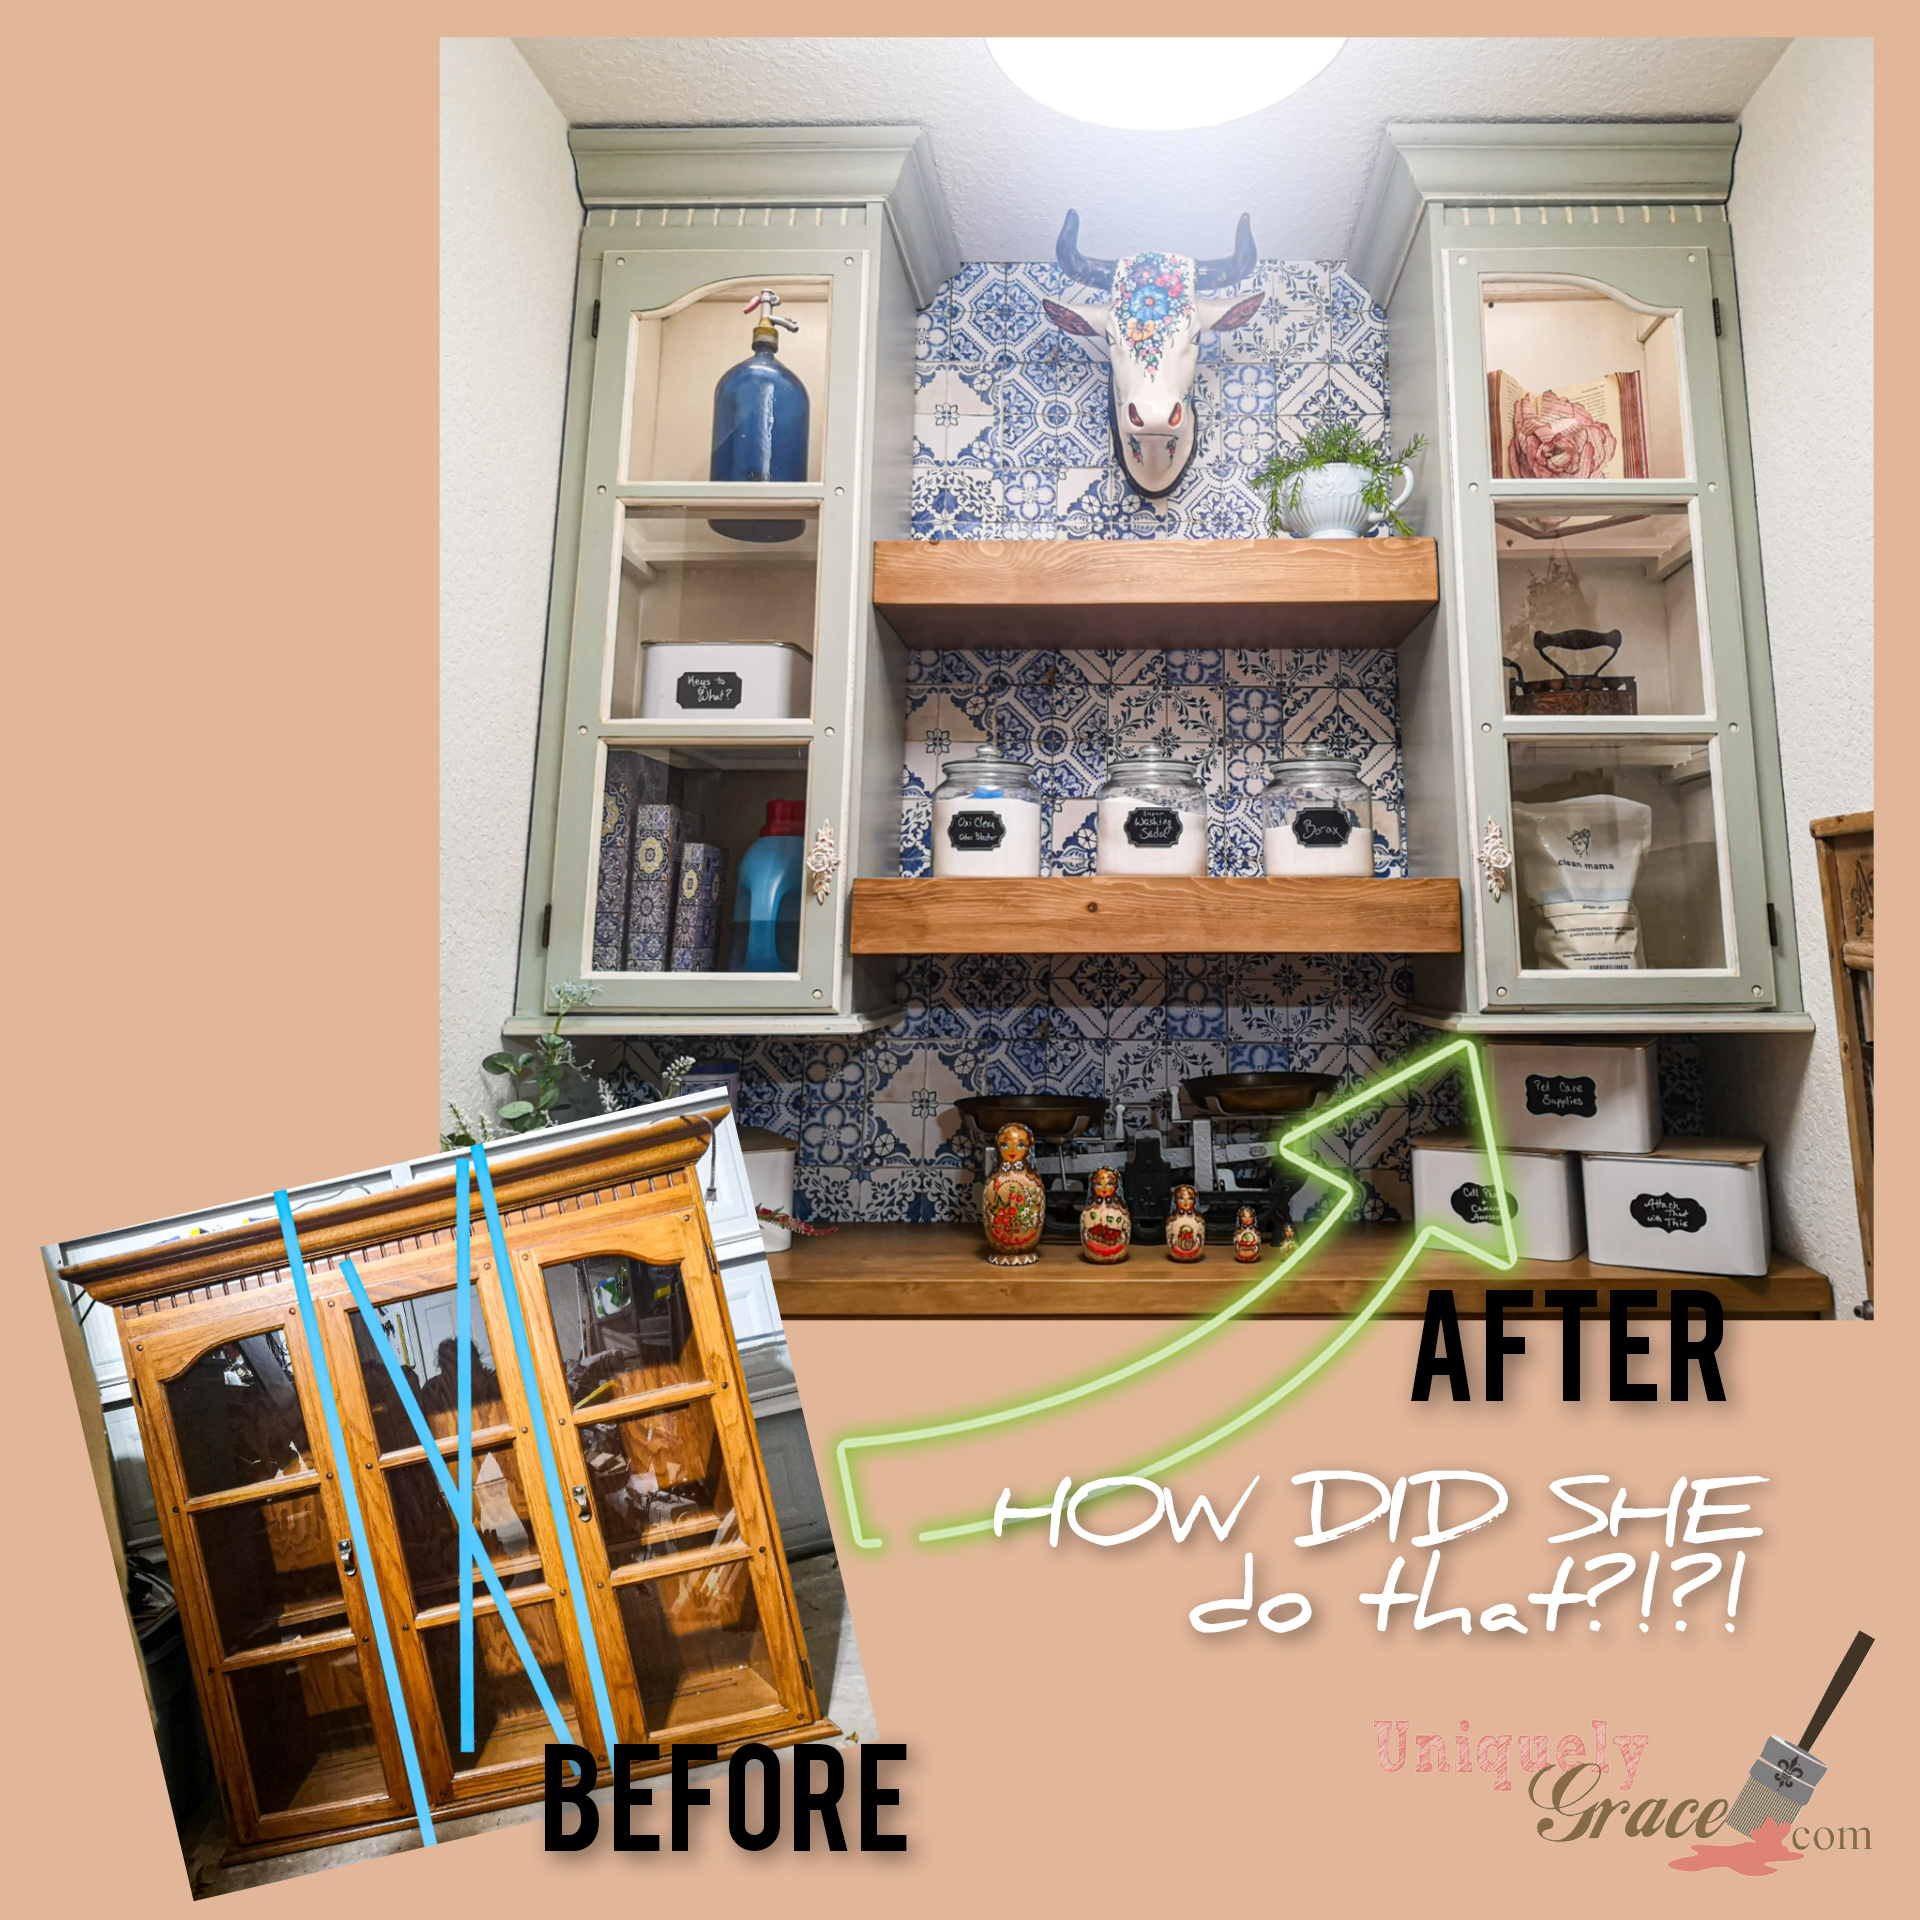
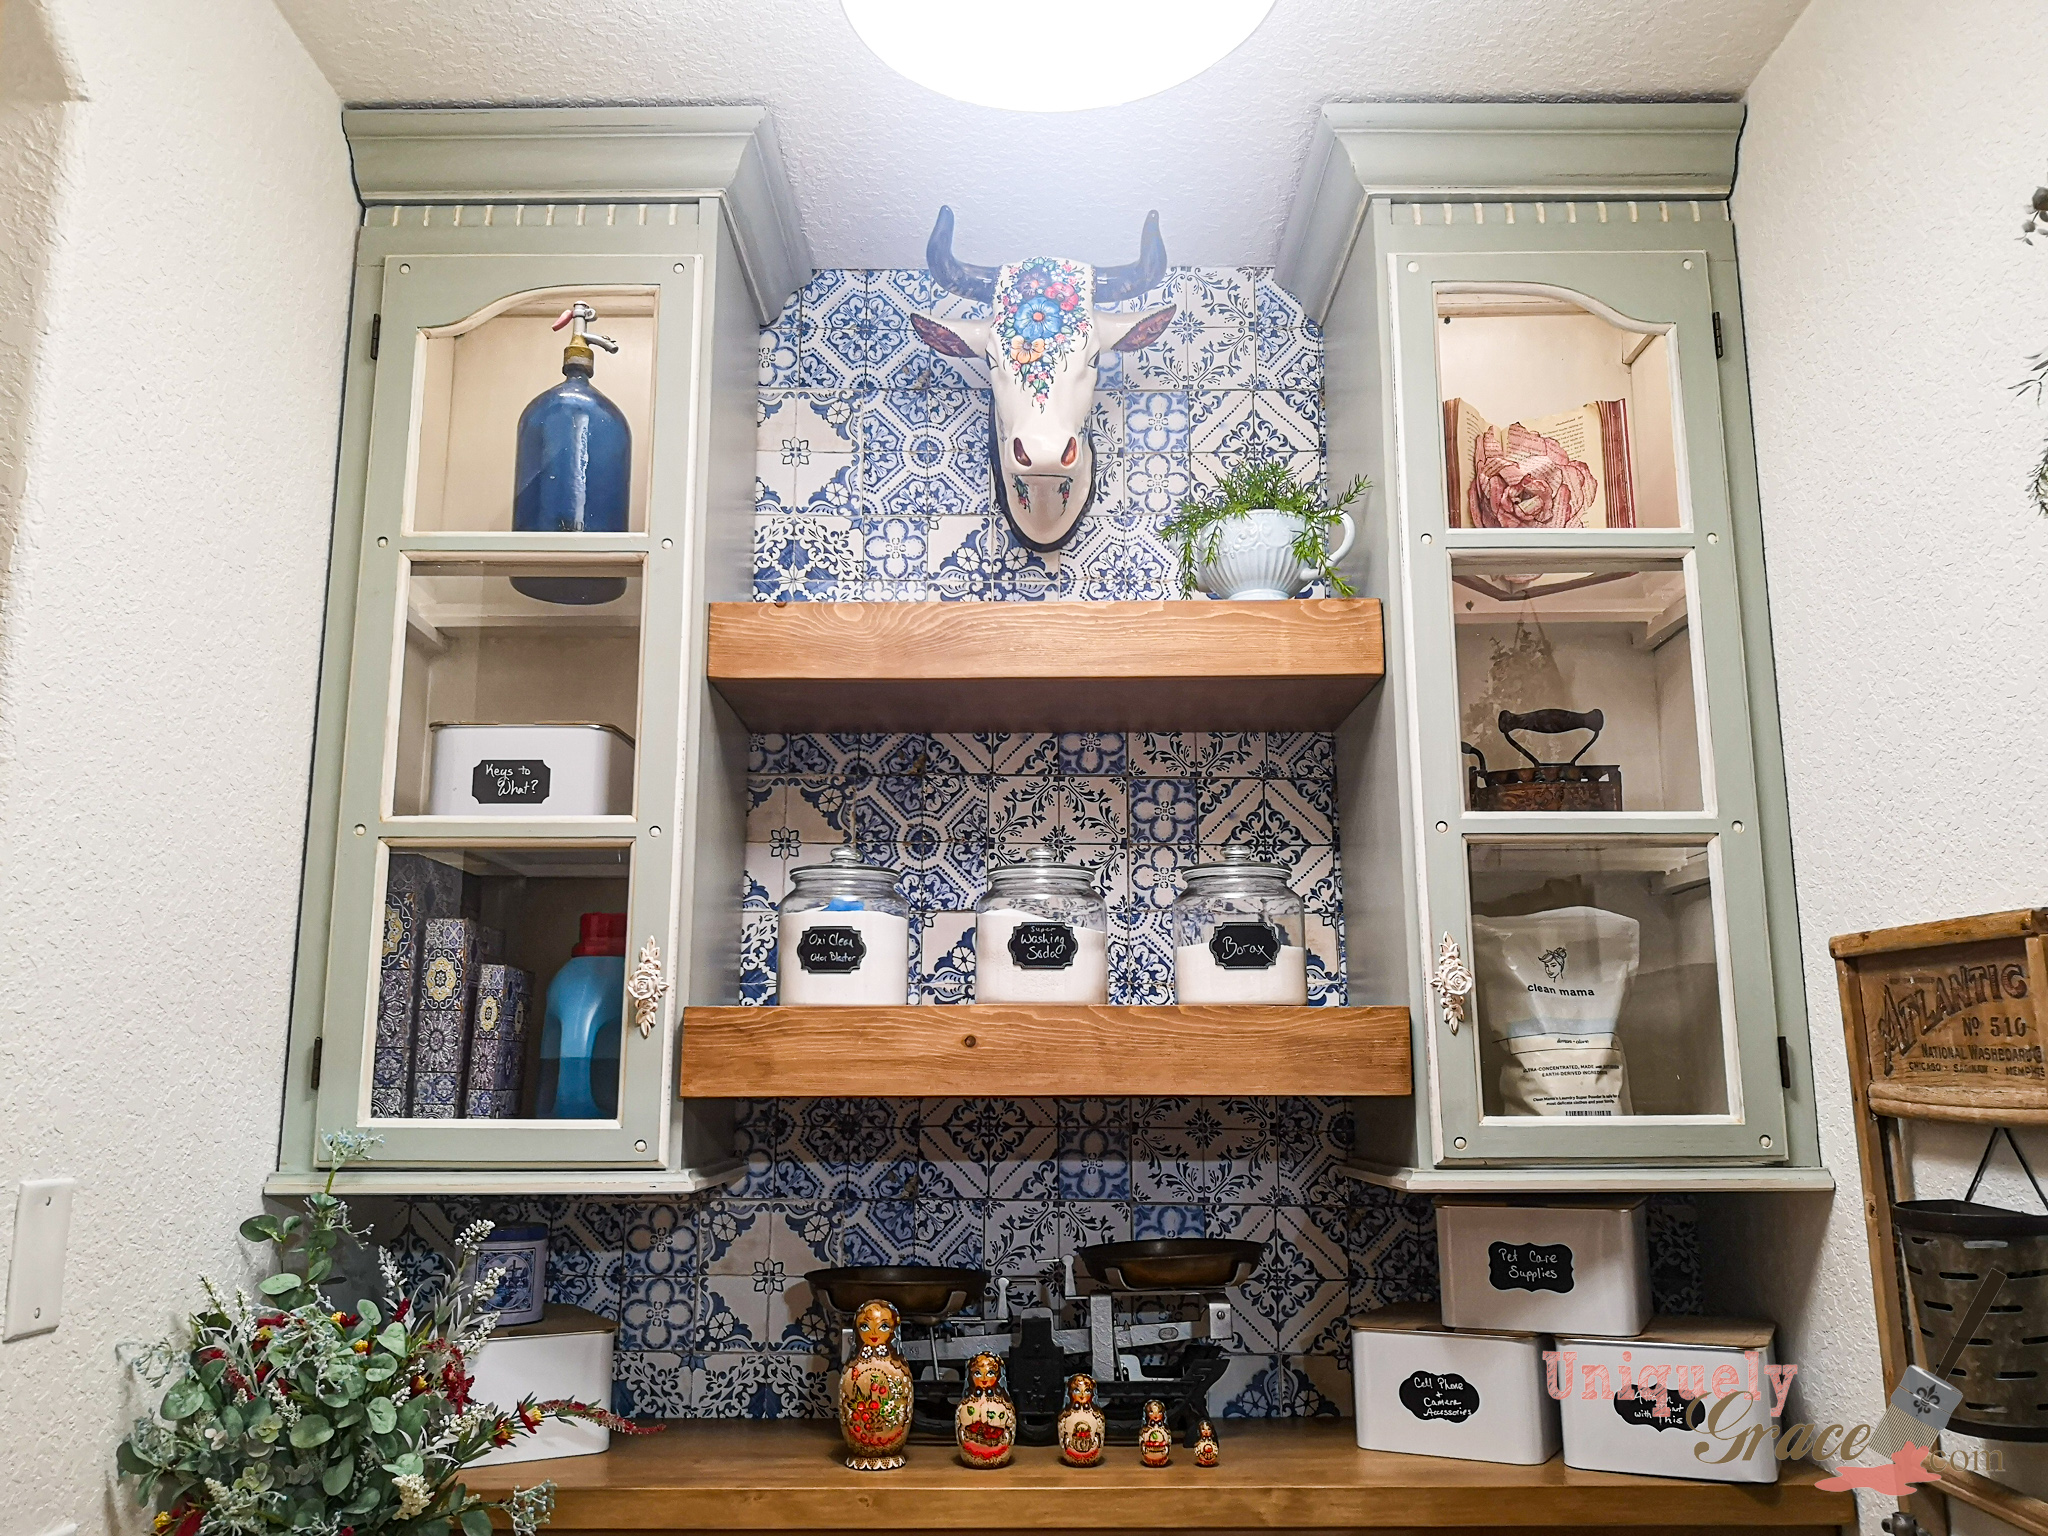
Oh my gosh friends! I am so thrilled to be sharing with you this old China hutch I upcycled into wall cabinets for my laundry room! I just love the way this space is turning out and I can’t wait to give you all a full tour. In the meantime make sure you check out the links at the bottom of this post to see the other projects I have completed for this space.
The Vision
Have you ever had a vision for something and tried to ask for help but no one had done it before or couldn’t quite understand your vision? Yeah! That was this project! I shared this image below, chatted online with some people/groups that I thought would be helpful and 80% of the comments were discouraging. They were telling me,
“You will ruin this piece”
You mean… the one I only paid $25 for? The one that is missing the bottom 1/2 already? HAHA! I was told
“It is going to be to much work” or “cost to much to reinforce” and “You should just use the doors and build new boxes.”
No matter what the comments were they all… good and bad encouraged me! Yup that’s right I am a stubborn to the core. They made me want to prove to them I could do it, I could do it well, I could save a ton of money doing it and it would be amazing! So my wonderful readers… want to see how I did? Let’s get started!
(when this blog was written no links were affiliated)
China Hutch Upcycled into Wall Cabinets…
Rewind to a little over a month ago I found myself working on the counter top upcycle project to the laundry room and looking at purchasing cabinets for the wall above for storage. I loved the way it looked, so I checked out my budget options at the time used ones on FB Marketplace were not the right size, Habitat for Humanity Restore (my usual go to for reused items) only had used bases and new uppers to the tune of $100 a pop. Needing 2 that was going to be 70% of my budget Then I thought one last ditch effort I would check my favorite big box store for a possible unfinished cabinet. Well… even pricier!
I started to think outside the box… What about a china hutch? I searched FB Marketplace for a few days and this one popped up for $25! TWENTY FIVE DOLLARS PEOPLE! The man had it listed for the complete hutch for weeks, his buyer only wanted the bottom for an entertainment center so he priced this ugly and useless cabinet with beautiful bones… what do you think… such a winner! No base, no legs, that honey oak color from the 80s more than likely.
(The financial break down of this project will be shared at the bottom of this post.)
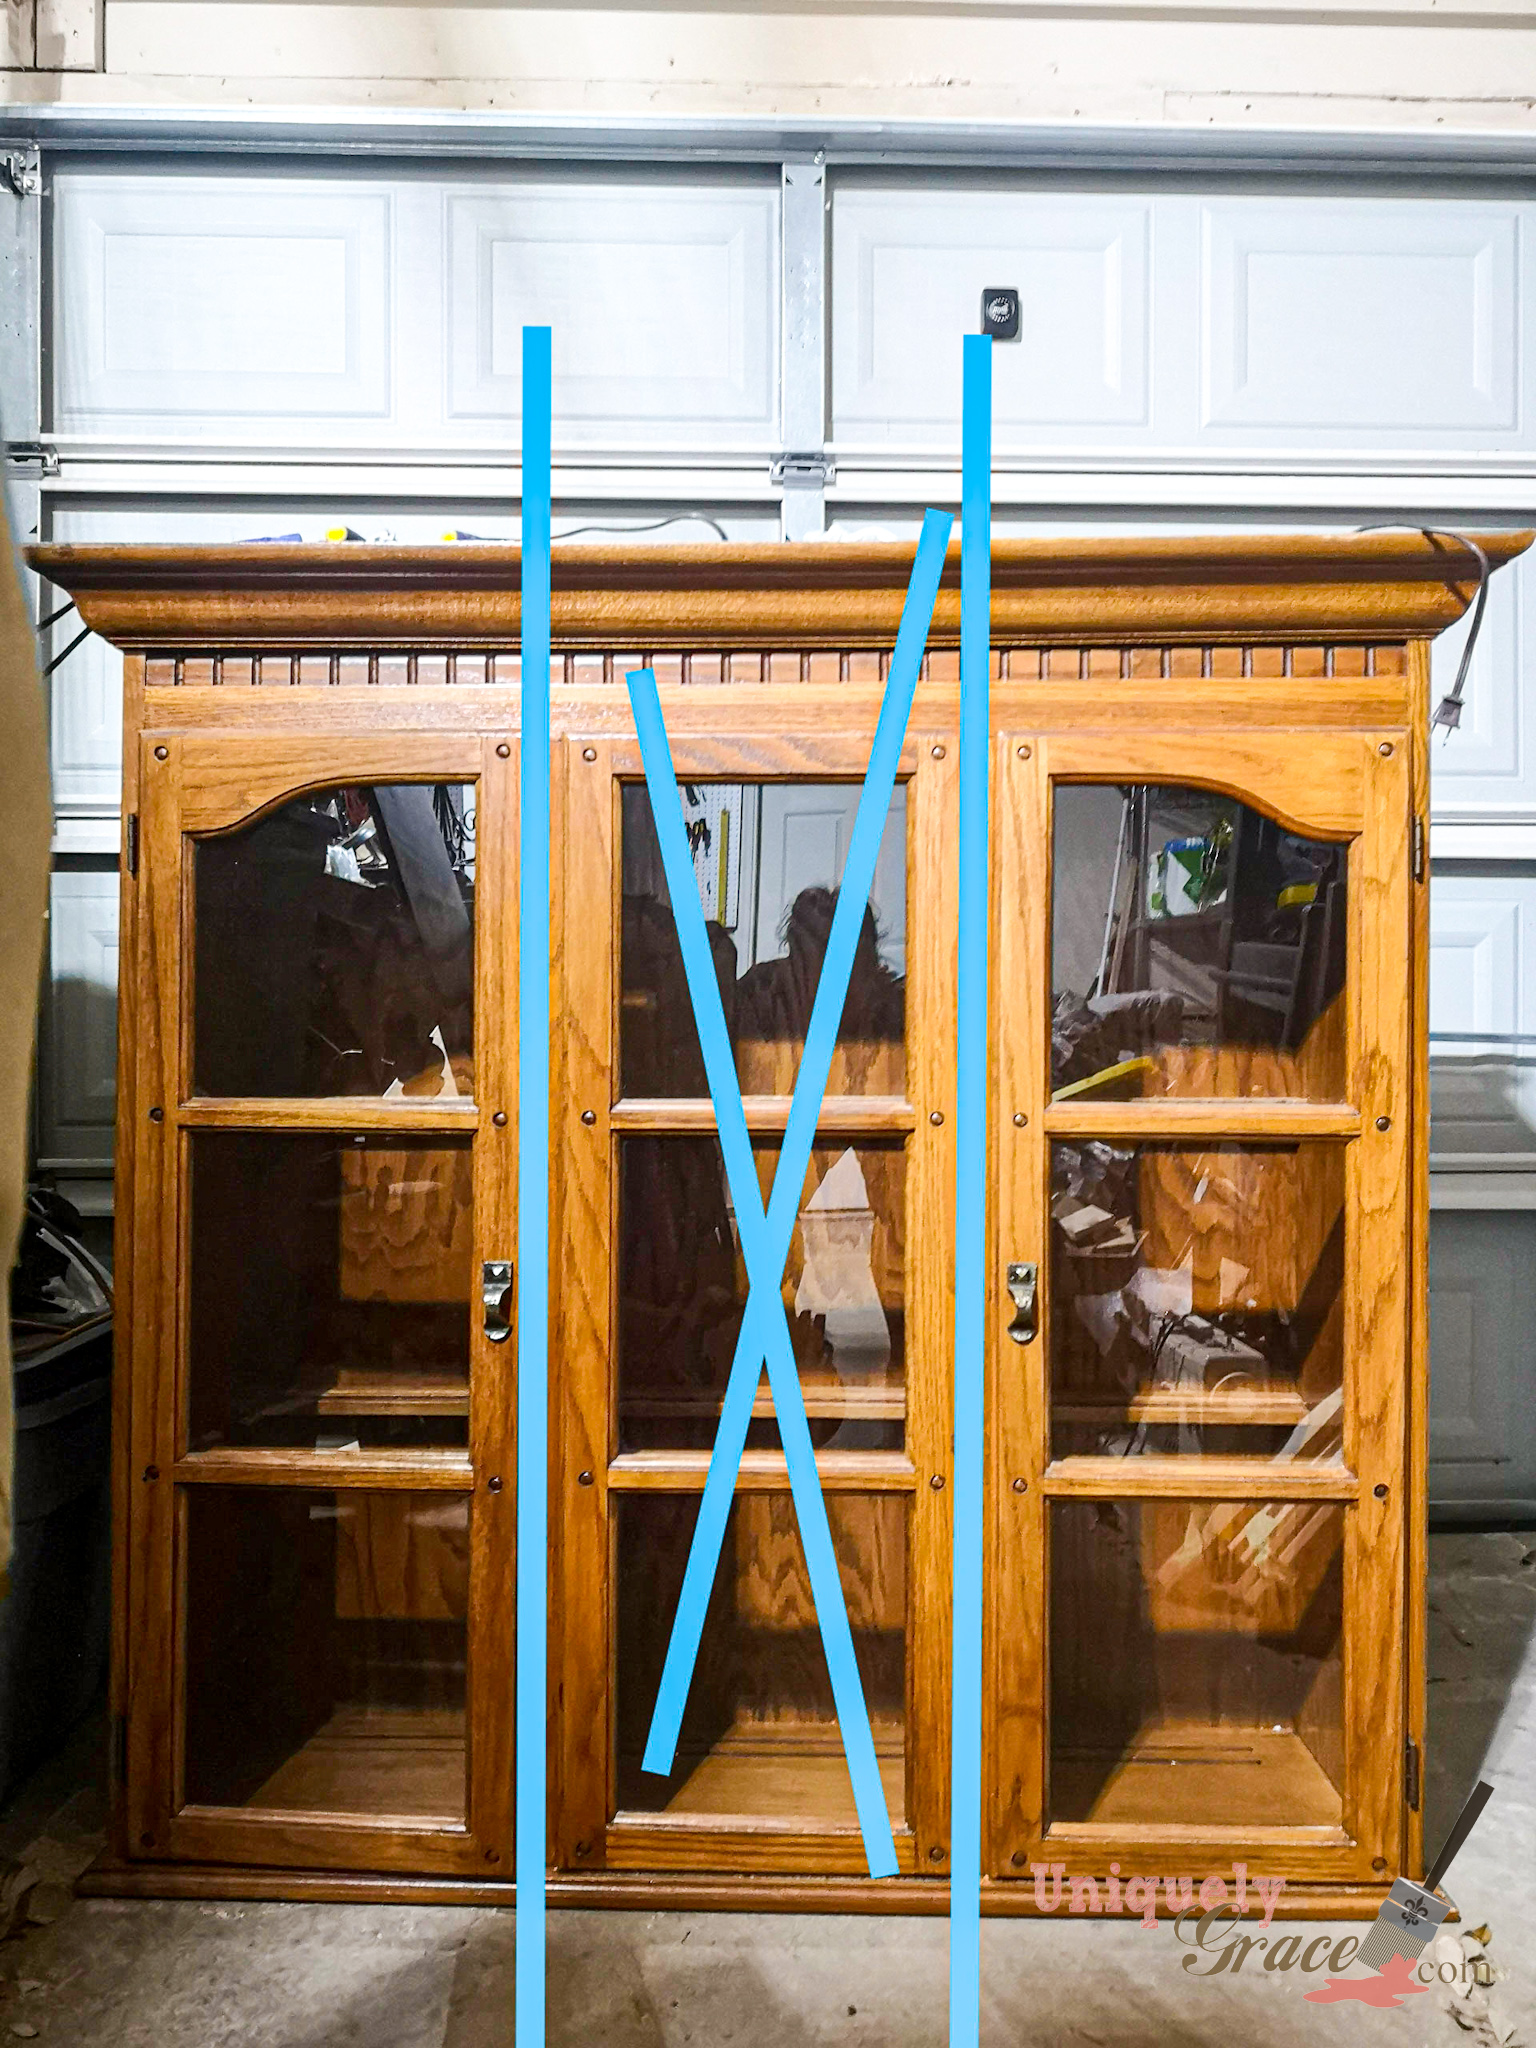
My mind sees past all these things. It sees past the fact that is has 3 doors not two, it sees past that it has glass shelves (harder to cut) it sees past the dirt and dust.
I saw her, I drove two hours round trip to pick her up, and I knew she was the right one. What I didn’t know is how the heck was I going to make her work! This is when the hubby lets out a big sigh and before he says a word, I look at him and tell him,
“She speaks to me. Can you hear her honey?”
(Insert Hubby’s massive eye roll)
Determination and Sleep
Days of research I finally found 2 people… TWO PEOPLE who had done something similar to what I was going to attempt. They gave me a few sentences of advise between more negative comments of discouragement. I was starting to loose sleep. I know it can be done, should be quite easy, but I just didn’t know how. HOW? Fed-up and fueled by the negativity and slightly encouraged by my two new FB friends it was time for action. I just had to “get out of my own way” as my friend Chante Franco says on her PB&C podcast. I had enough! I crawled out of bed that night about 9:30pm, I never go to bed that early but I was exhausted from lack of sleep the last couple of nights. I went into the garage, took off the doors and prepared the built in light fixture…
Plugging in my circular saw, I turned it on and just went for it. Sawed that hutch right in half…. and it was not a pretty cut either! I came 1/2 of an inch from ruining it with my drive and determination to just start this project before bedtime. By 10:00pm I was done and I got cleaned up and drifted off to sleep quite soundly I may add.
“The Plan” – After the Circular Saw Moment
The next morning I got ready for the day, ate my breakfast while creating a plan. I took a deep breath and told the hubby, who is currently working from home due to COVID precautions,
“Today I am going to make this cabinet transformation happen!”
(Insert the slow roar of the garage door opening.) (Natural light begins to fill the space and The 2001 Space Odyssey Music begins to play on my Alexa, just kidding, but that would have been super cool. LOL!)
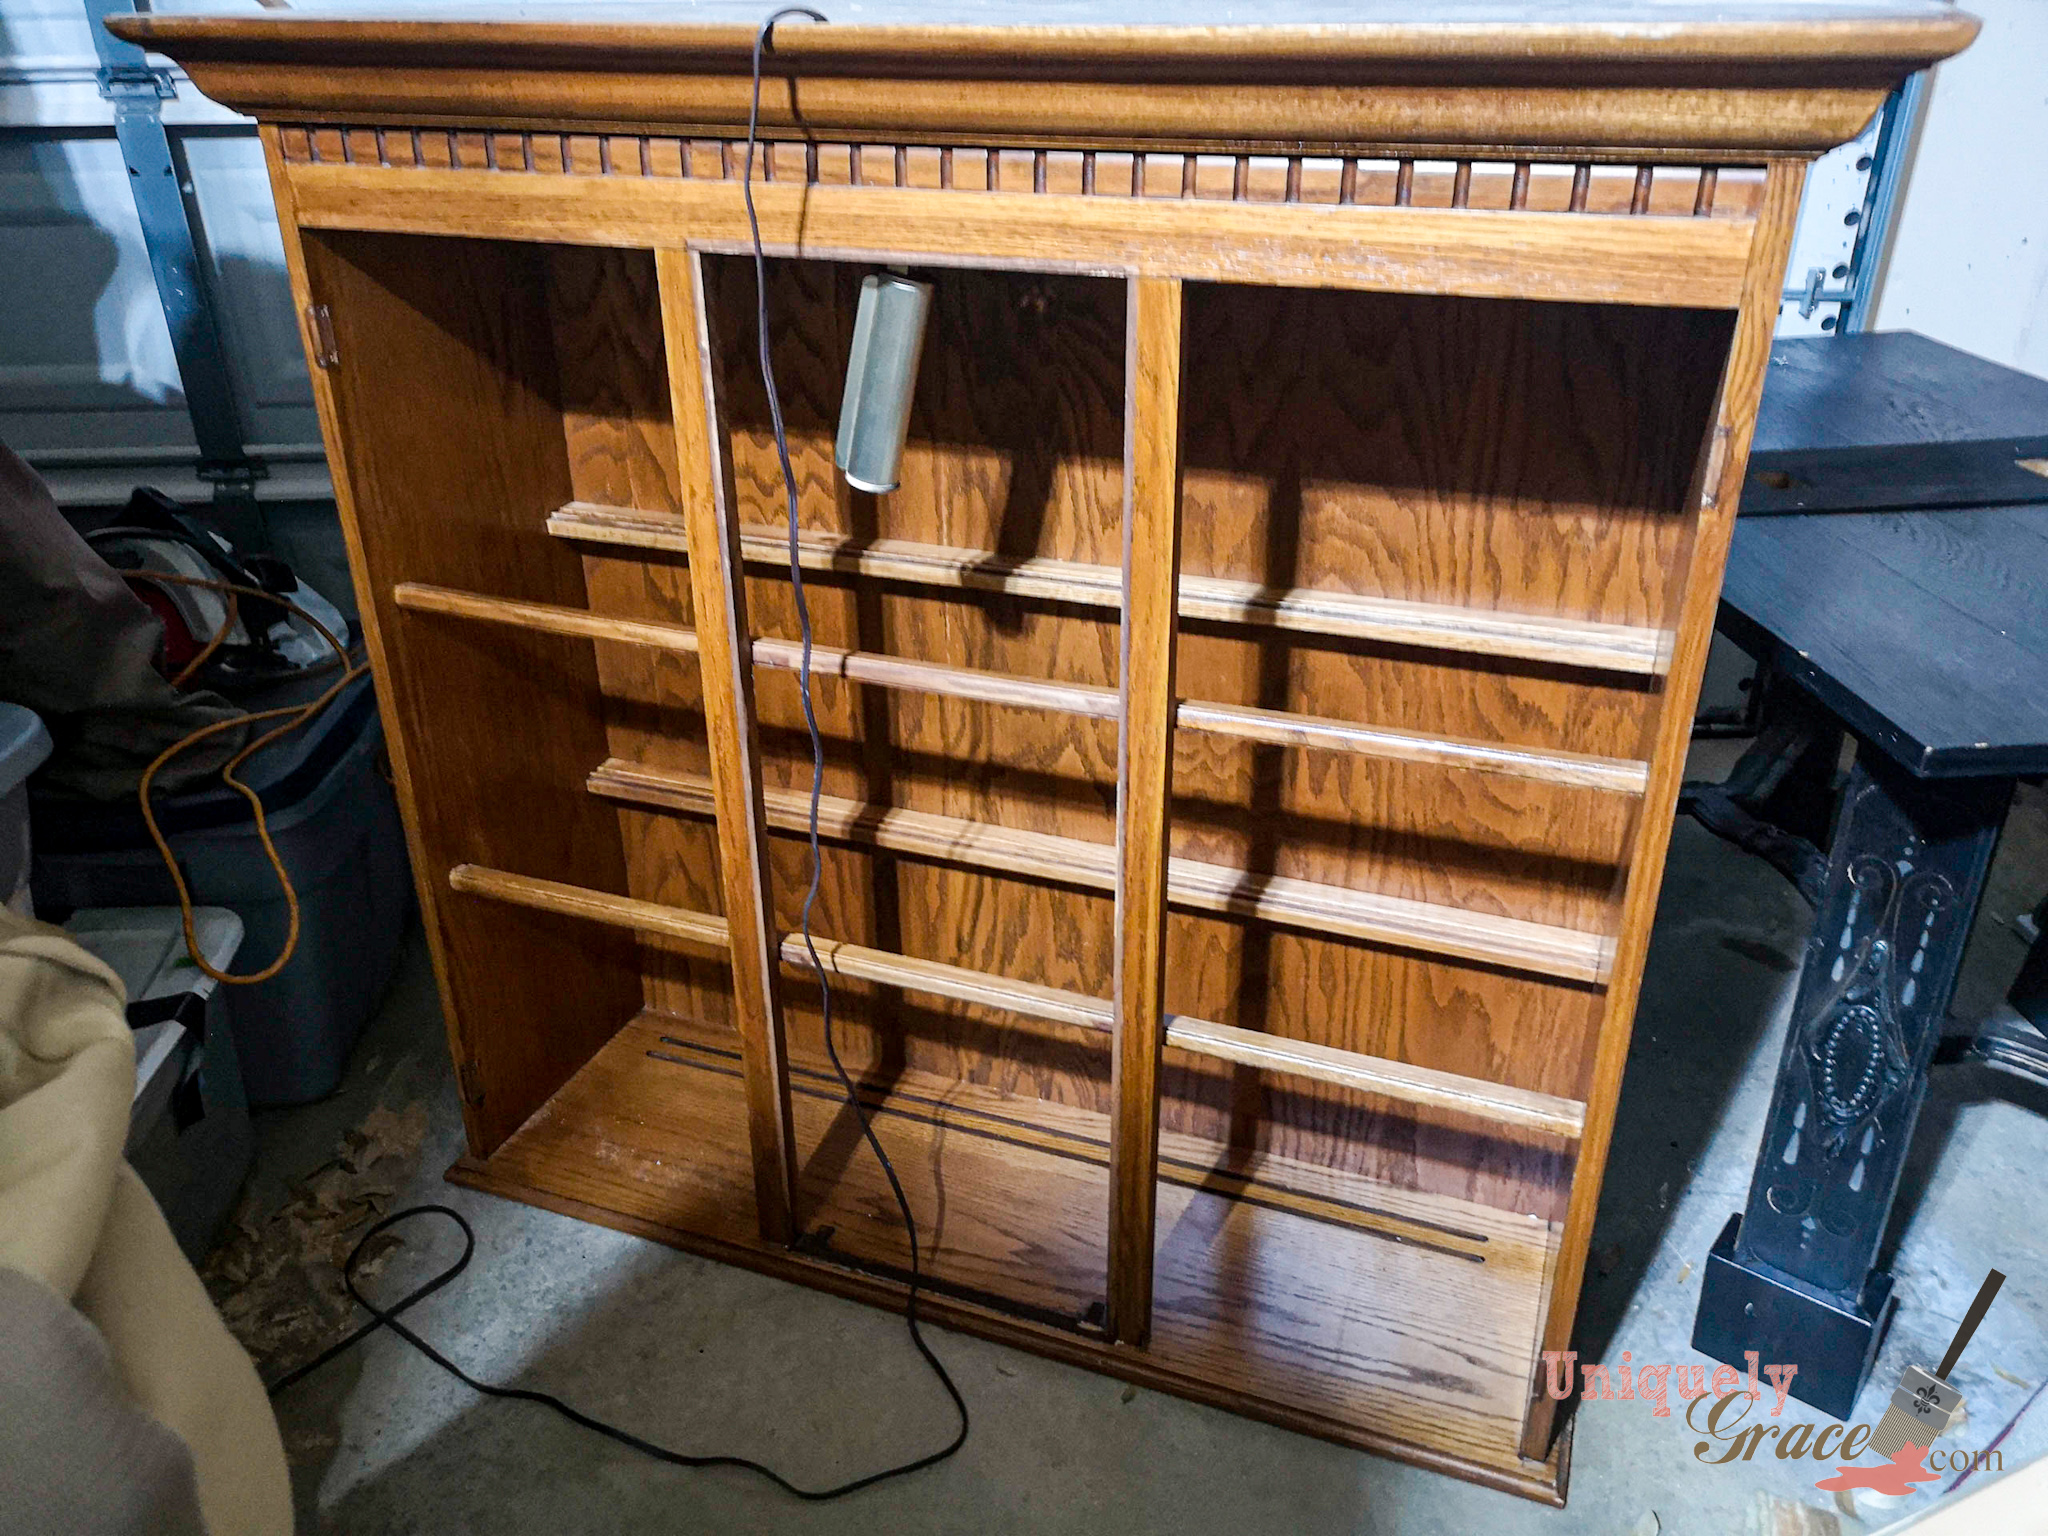
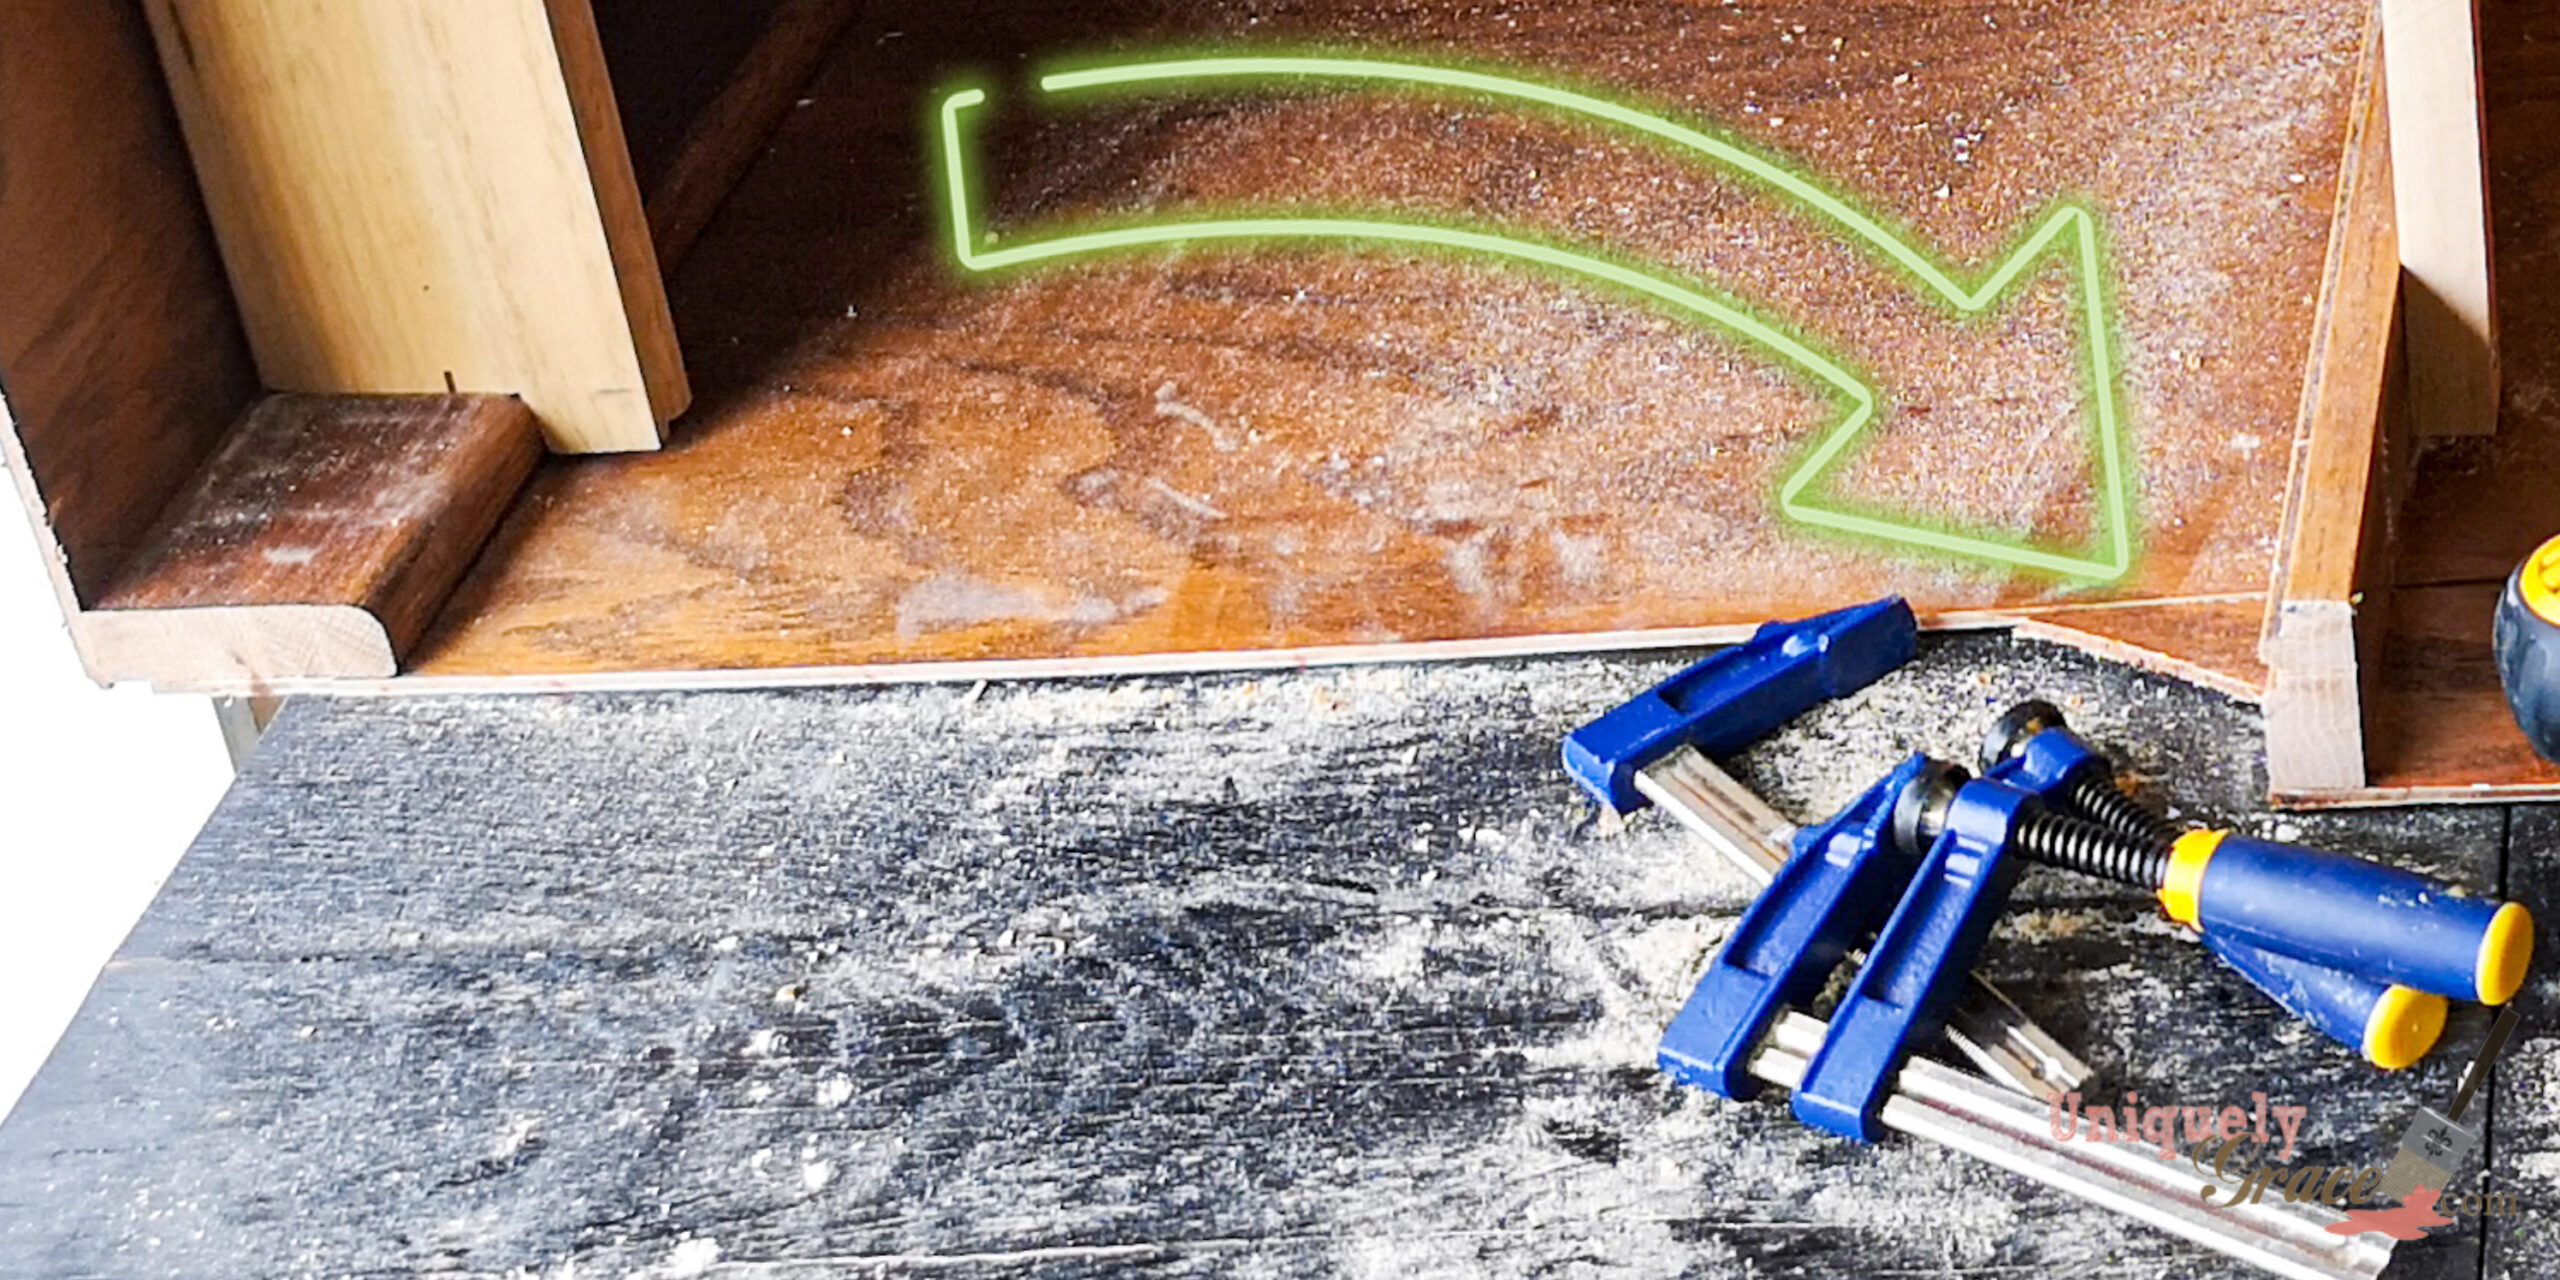
With my measuring tape in hand I set one of the now 2 cabinets on the table and began to square off the back and mark the guidelines for my clean cut I would need to make to fix the one that was 100% cut crooked from the night before. Checking out the structure and how to reinforce it. I use some scrap pieces to help support the shelves as I glued them to the front frames and cleaned up any drips all while measuring and squaring up the frame work.
“Measure twice cut (or glue) once!”
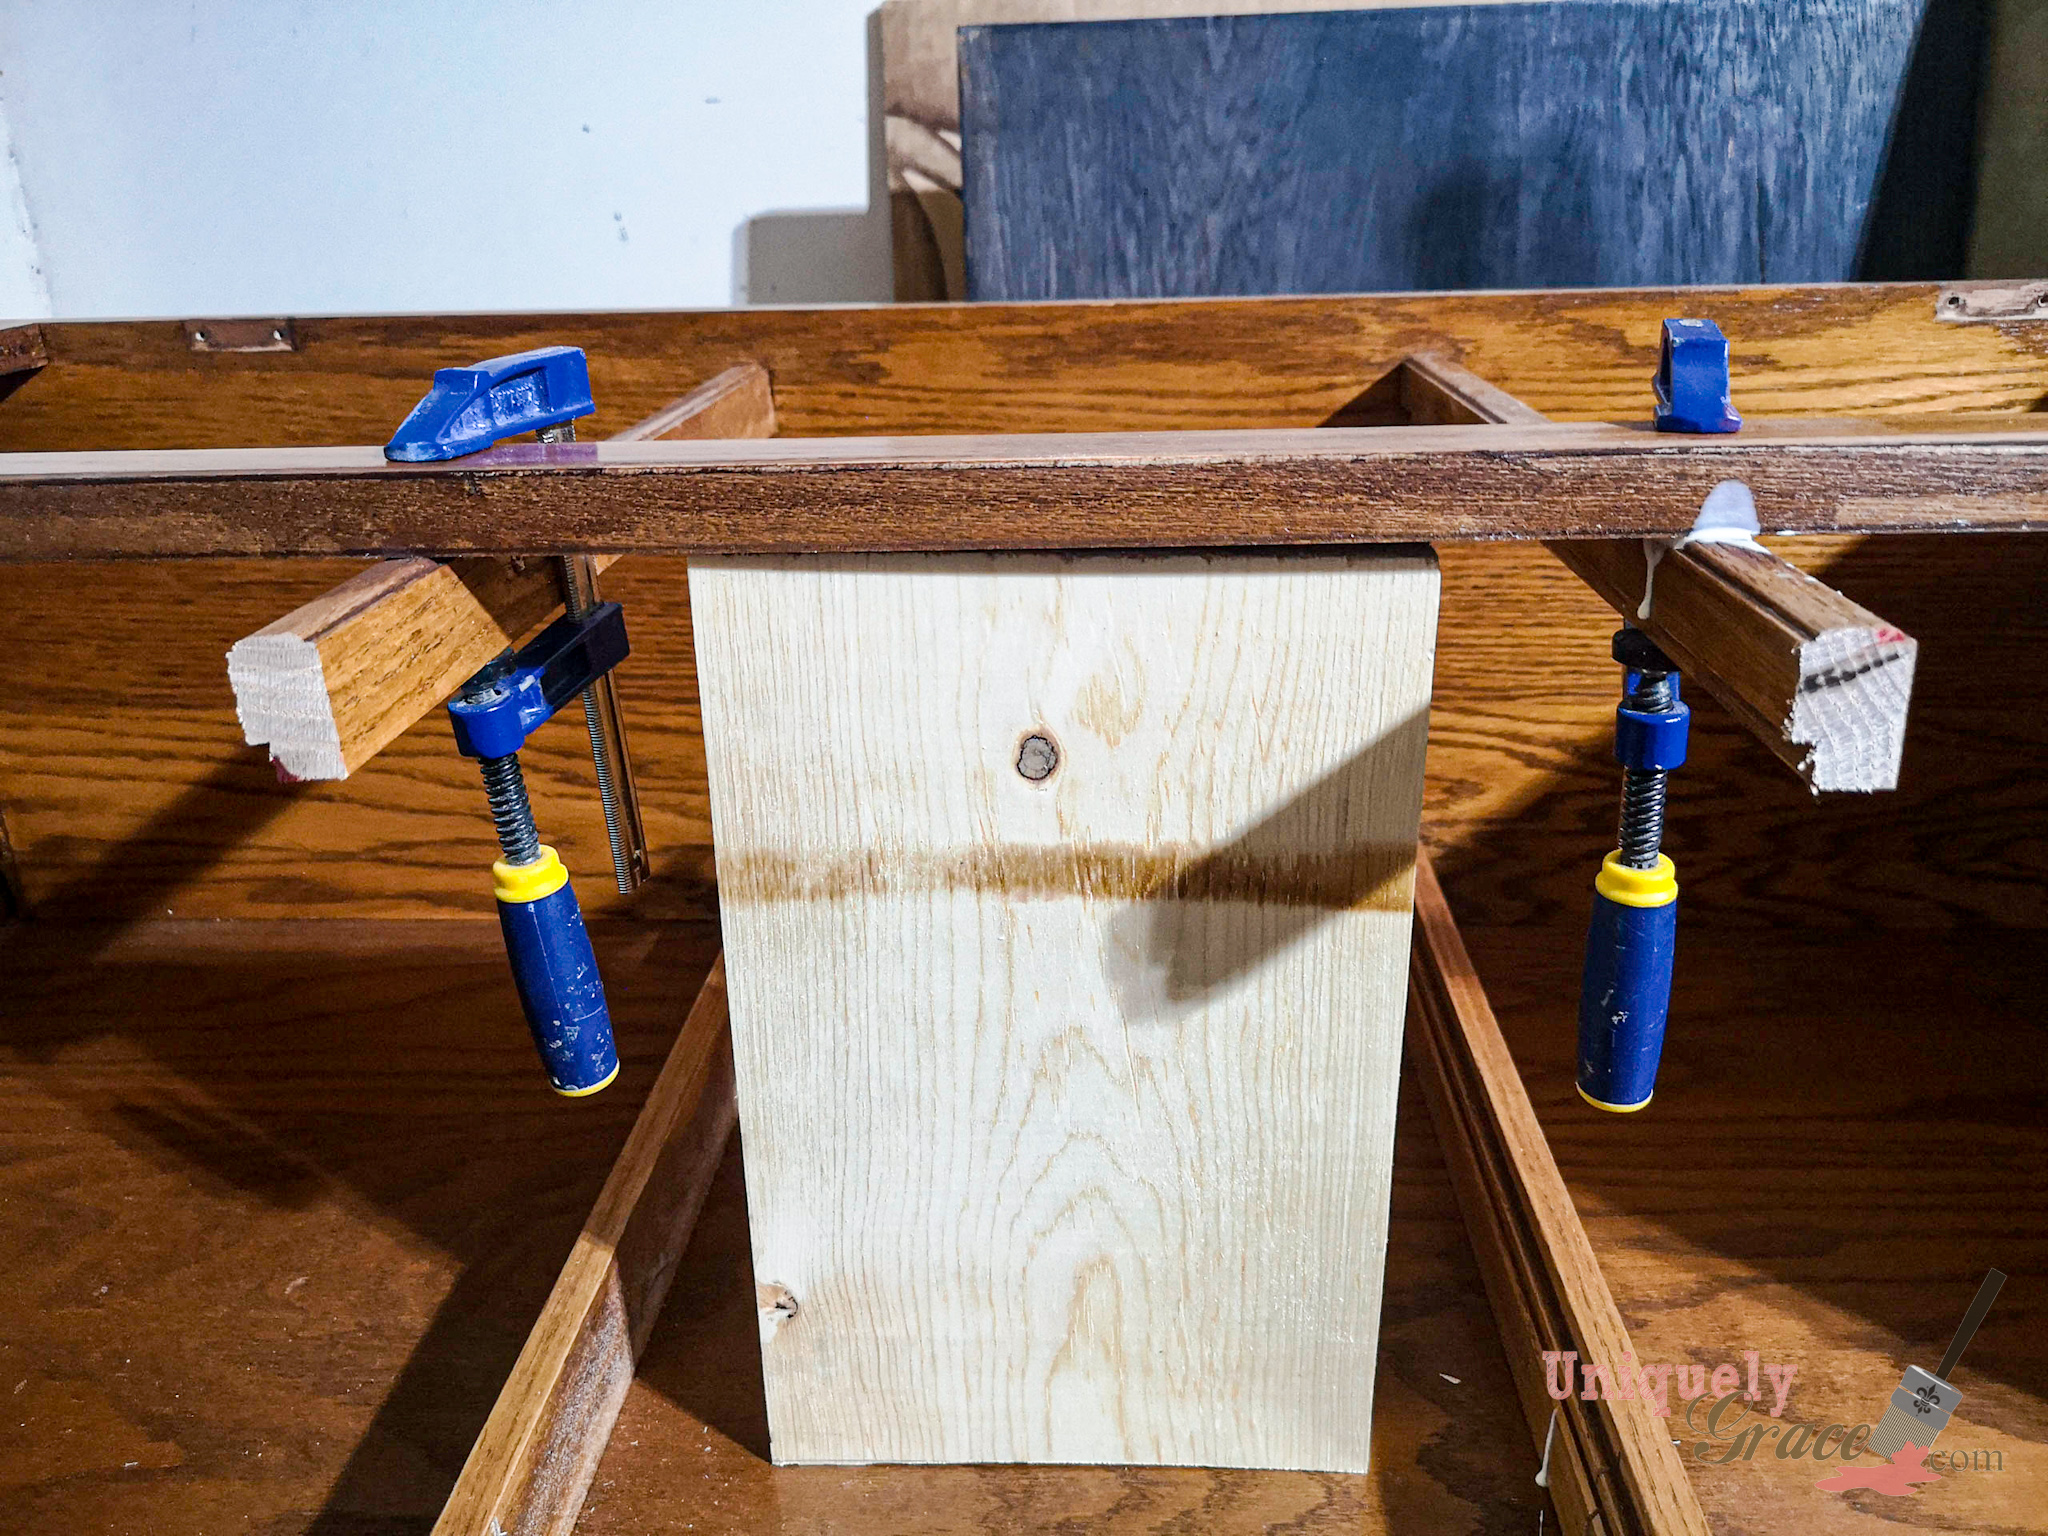
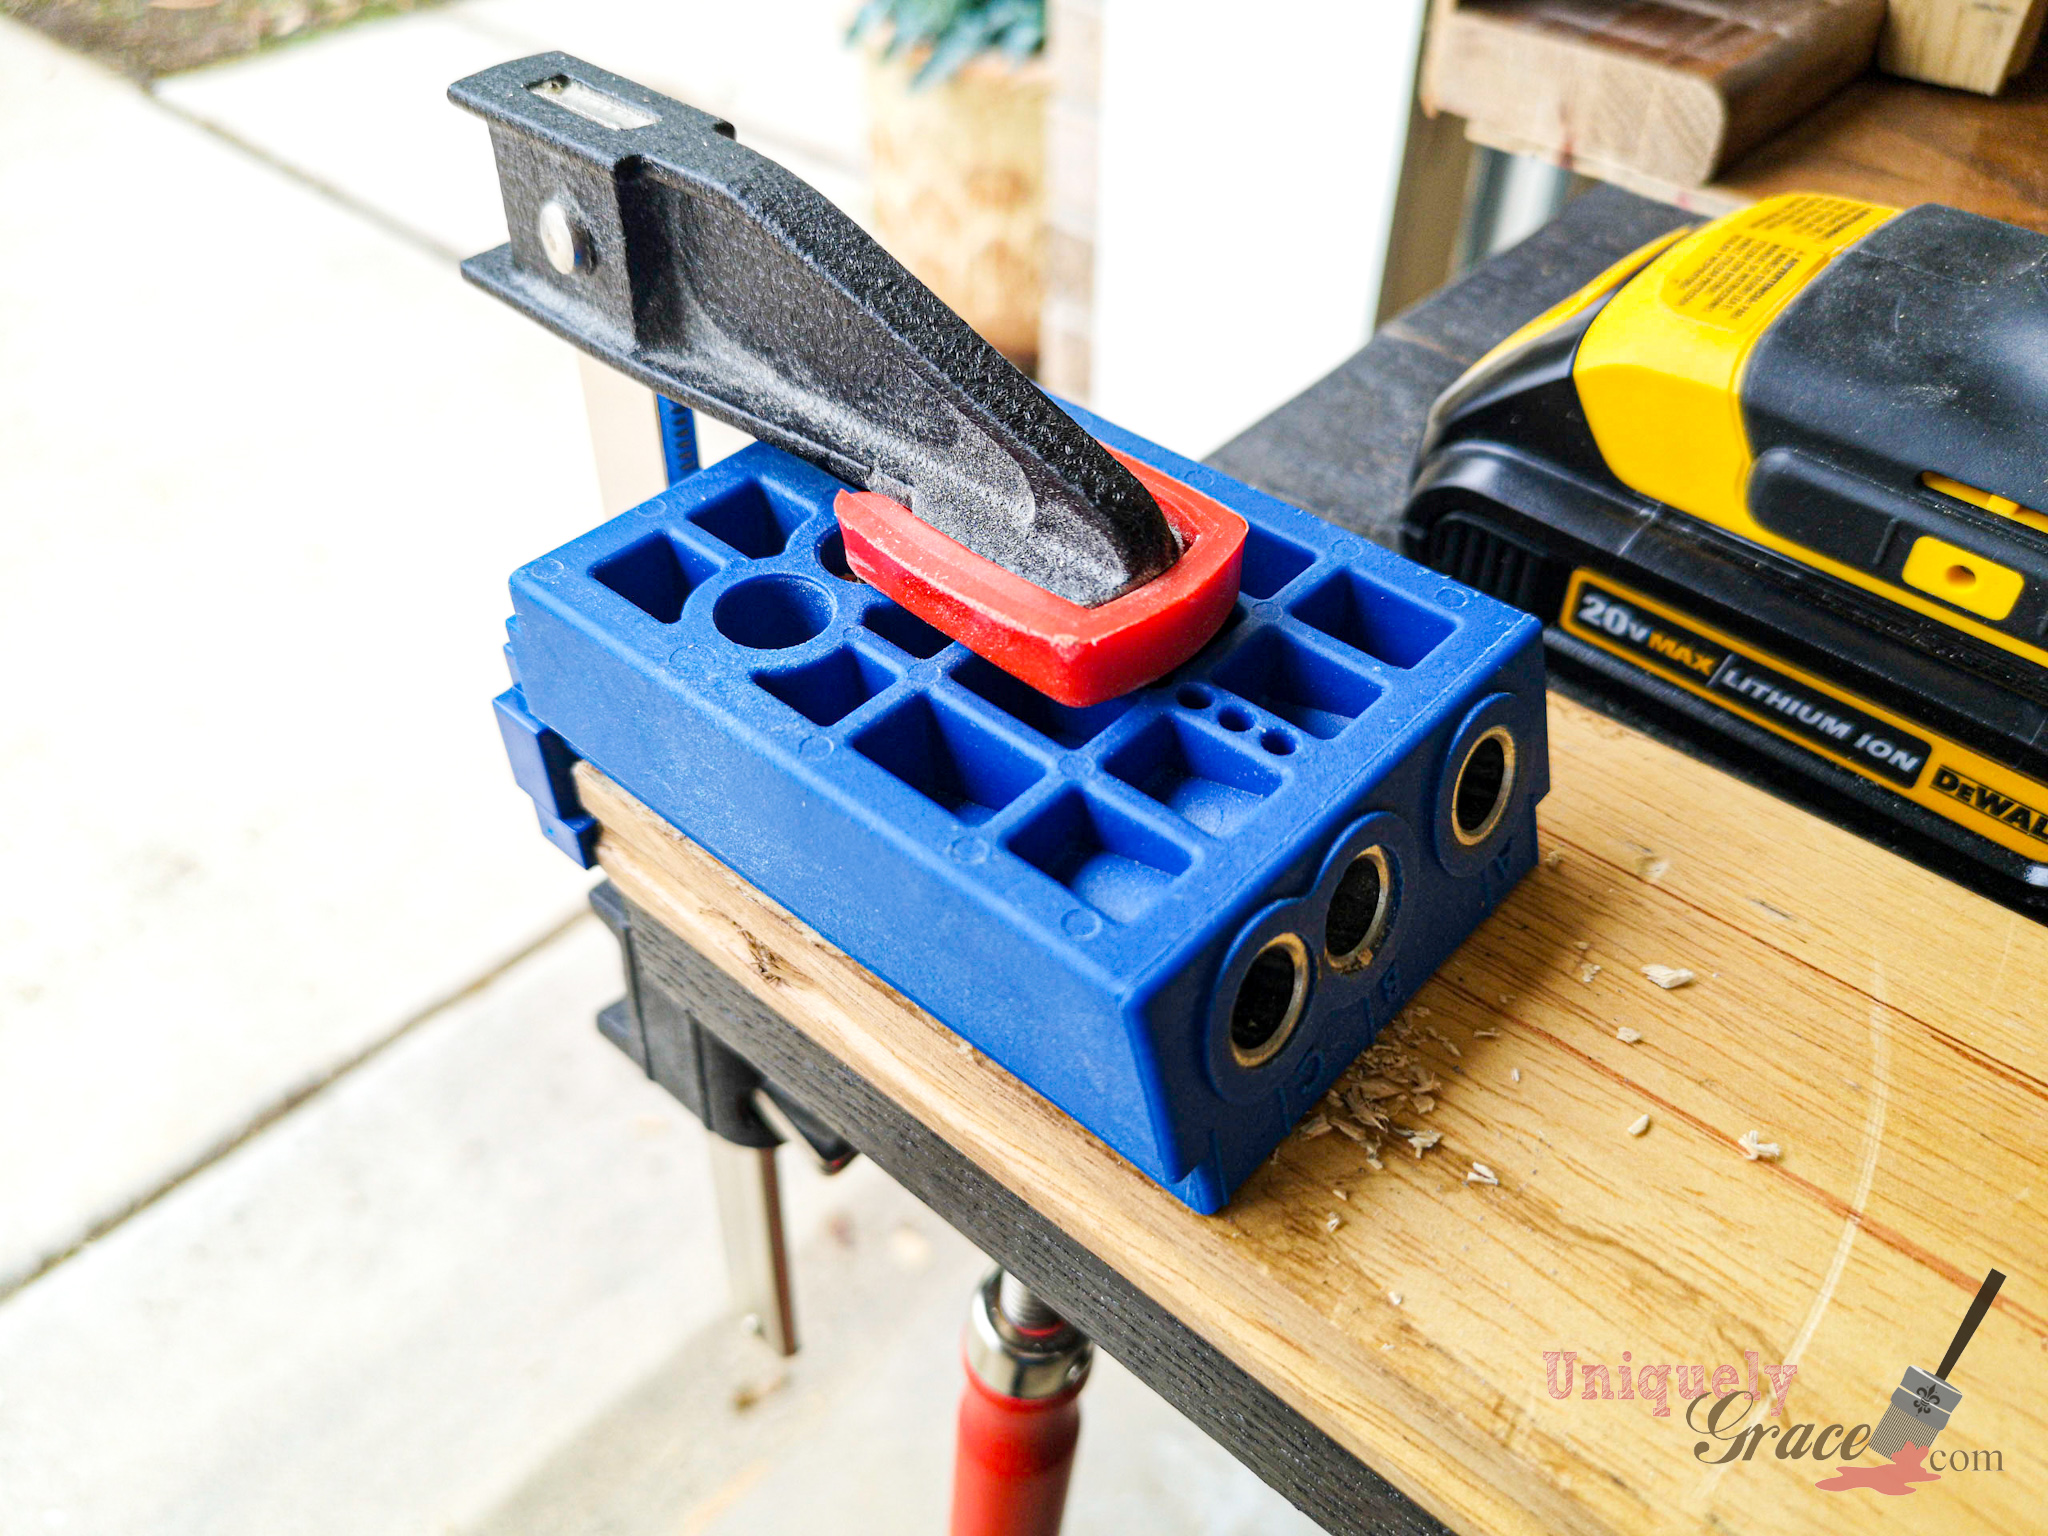
Using my trusty pocket hole jig from Kreg, I quickly measured, cut and secured some bracer bars on the now cut open side.
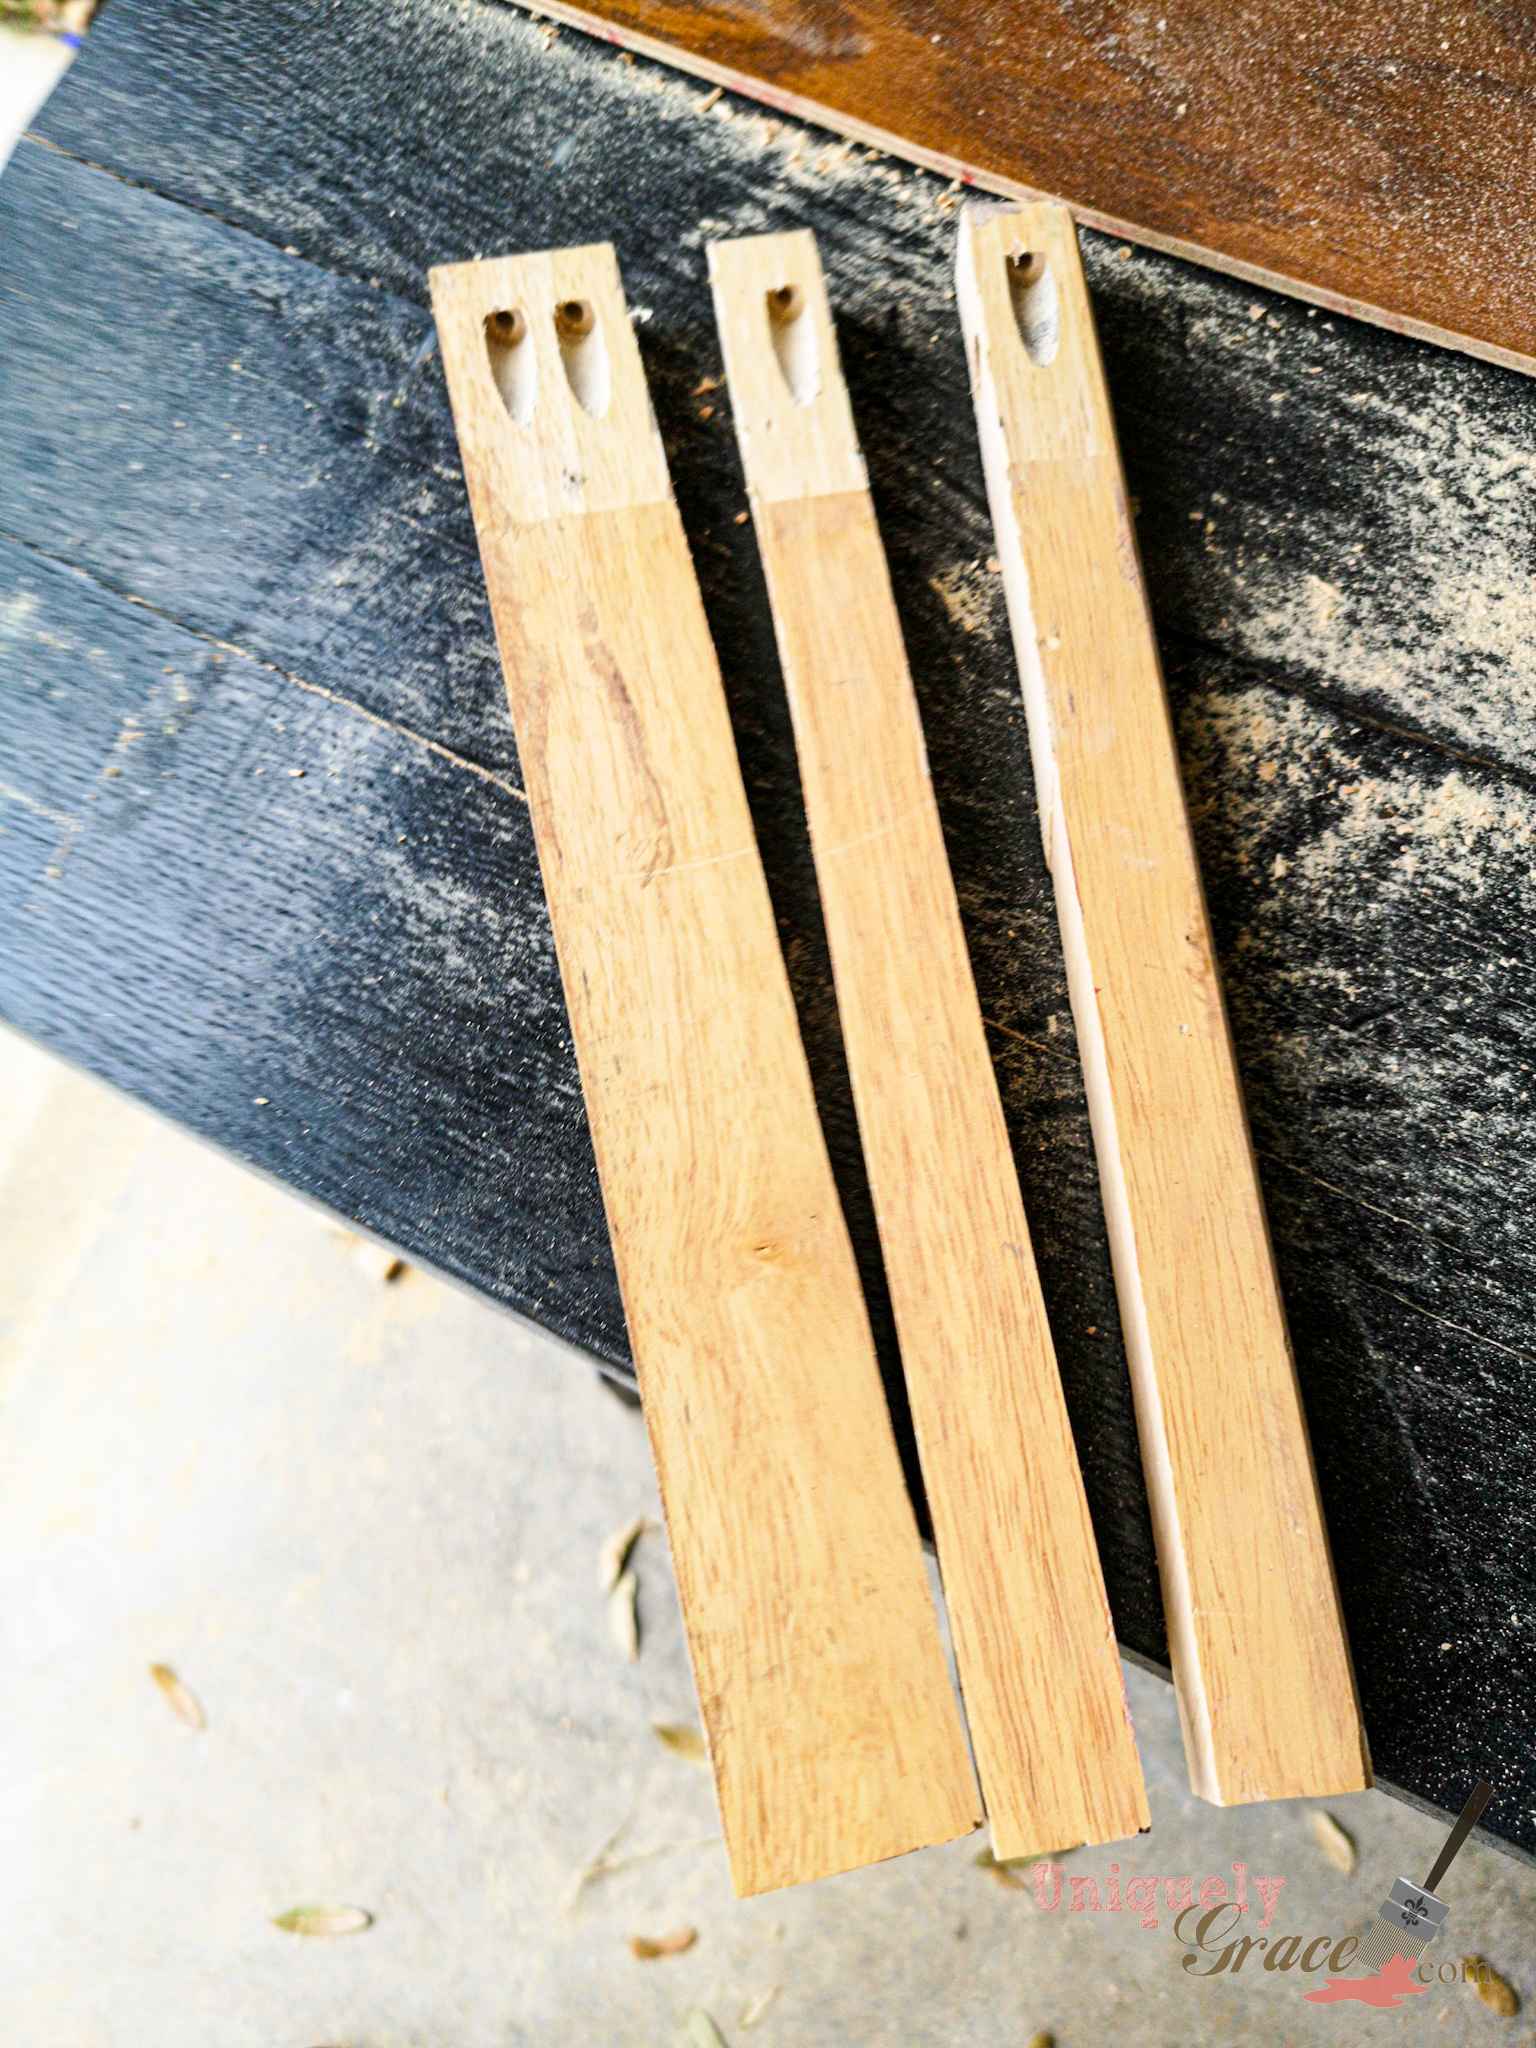
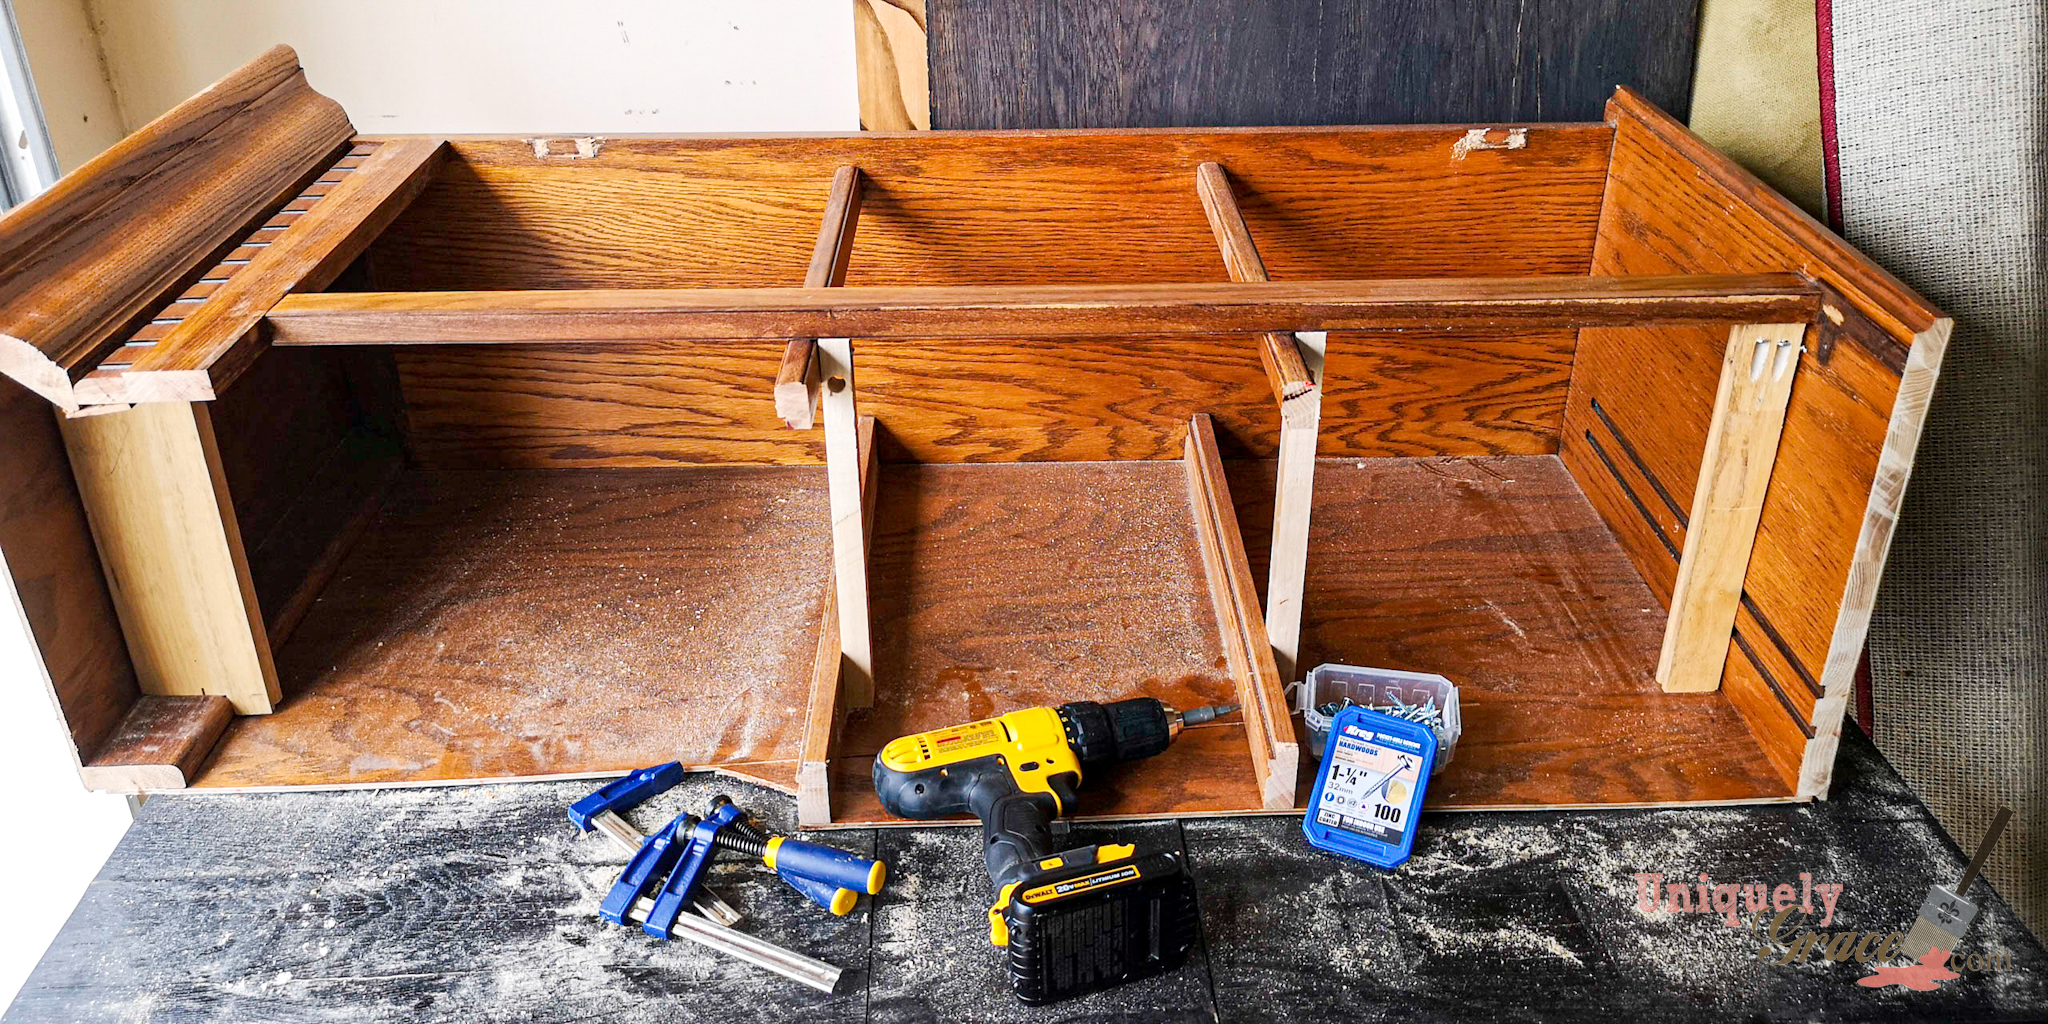
I created a support for the crown molding in the top as well and across the bottom shelf too with some scrap wood. The thin luan backing and top board were supported with some finishing nails and my nail gun.
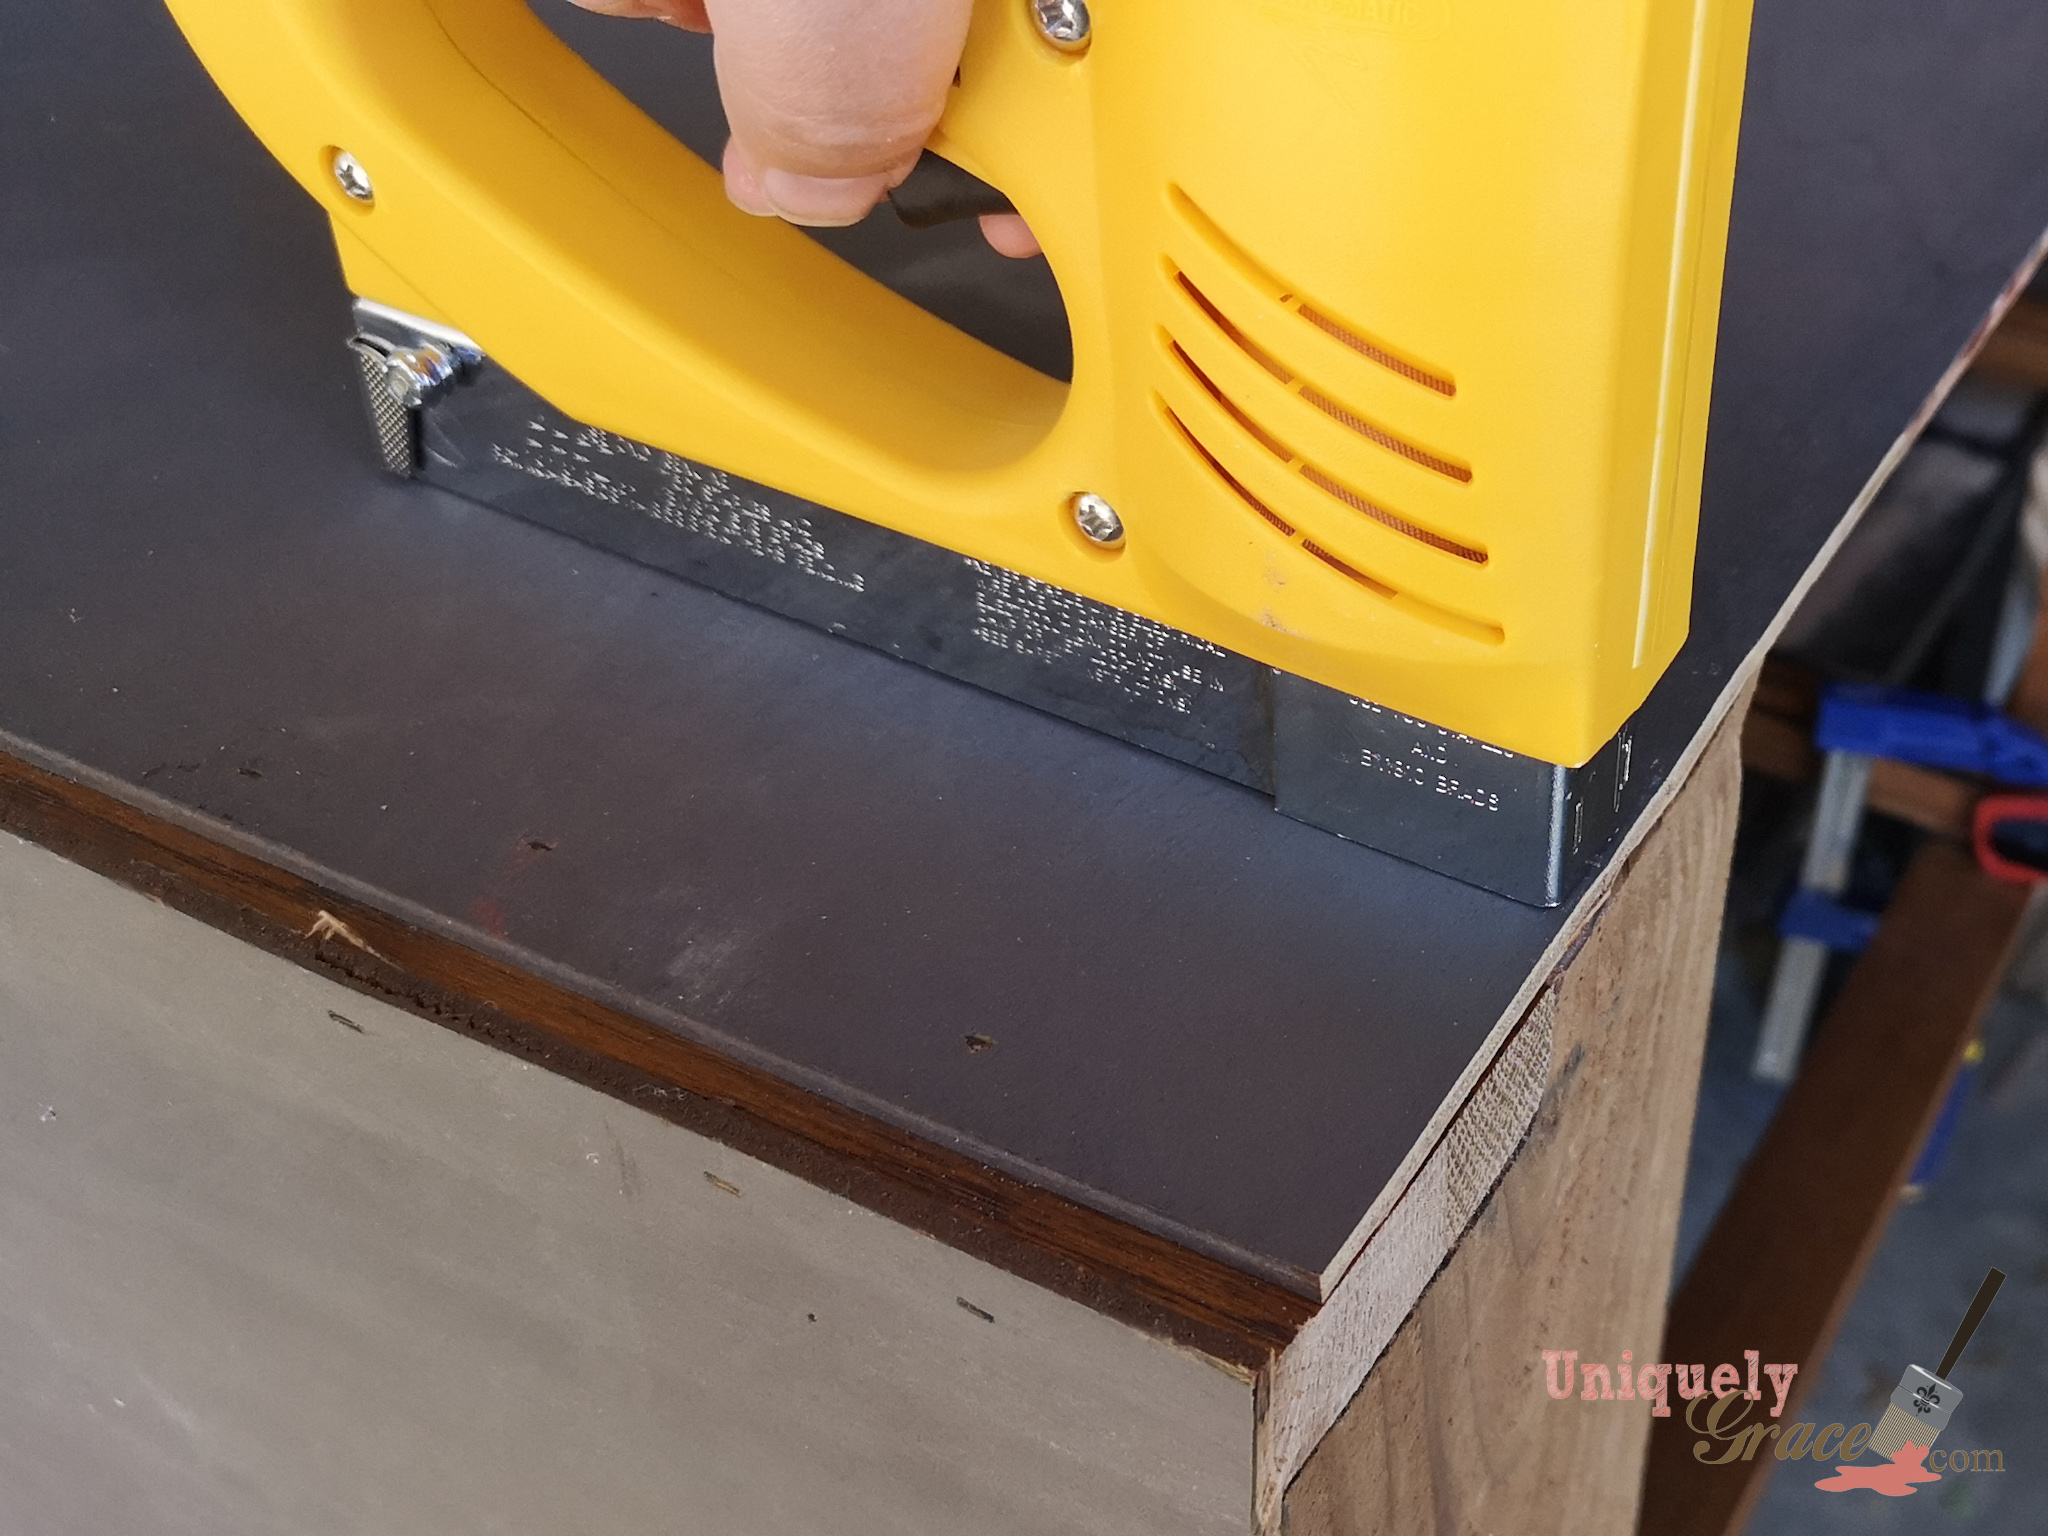
Once the piece was structurally strong again I moved it into the laundry room to get a sneak peek at how it would fit. These moments are always great for me to make sure my projects are on track and working out. I like to do them throughout the process to make sure any problems can be avoided or fixed easily before I move on to far.

I repeated the process for the other side. I was getting pretty excited at this point. It was almost time to paint!
Painting, Sealing & Installation
I gently sanded the finish and cleaned the pieces for chalk paint. Later that night I worked on mixing the right color for the greyish green I wanted for the color scheme. Using Terra Bella Paints & Finishes, I mixed up several colors before I was satisfied.
The next day I dove right in painting the interior of the cabinets with Snowfall, the exterior with the custom mixed grey green and then the trim and details with more of the Snowfall. Isn’t it pretty? These knobs are from Amazon.com

The cabinets were painted, sealed and inserts to cover the wall inside the open end of the cabinet were cut and painted. They were installed with a French cleat bracket and some extra long wood screws into the studs. These cabinets are not going anywhere.
So here is the beautiful final product…
Financial Details
| DIY ITEM | DIY COST | NEW ITEM | NEW ITEM COST |
| China Hutch | $25 | Wall Cabinet boxes similar size (x2) | $403 |
| Glass doors | Included | Wall Cabinet glass doors (x2) | $302 |
| Crown Molding | Included | Crown Molding | $14 |
| Dental Molding | Included | Dental Molding | $23 |
| Terra Bella Chalk Paint Used | $15 | Terra Bella Chalk Paint Used | $15 |
| Terra Bella Liquid Wax Used | $10 | Terra Bella Liquid Wax Used | $10 |
| French Cleat | $16.25 | French Cleat | $16.25 |
| Lighting LED Remote (on sale) | $17 | Lighting LED Remote (on sale) | $17 |
| Rose, Ivory & Gold Knobs | $14 | Rose, Ivory & Gold Knobs | $14 |
| Glass Shelf Cut to size | $20 | N/A | |
| Total DIY Cost | $117.25 | Total NEW Cost | $814.25 |
WOW! Can you believe it?!?! Look at that a total savings of $697 if I were to buy this new. I still would not have the arched doors, the glass shelves nor the bottom shelf detail that is built in not an additional molding. I can’t believe it! Are you as excited as I am to see the final cost of this renovation?
Other Laundry Room Makeover Projects:
- Custom Color Paint Recipe: Custom Mixed Color – Light Sage Grey Neutral Chalk Paint Color Recipe
- Creative Counter Tops – $20 Table Upcycled into Stunning New Folding Countertop for Laundry
- 20 Min Floral Wreath – How To Video – Floral Wood Circle Wreath In 20 Minutes!
- Floating Shelves with a Hidden Secret – Surprising Floating Shelves With A Hidden Secret – Easy DIY Project
Thank you so much for joining me today. I am happy you are here. Please make sure you pin this, or comment below to help me with my business, it’s free to help bloggers ya know. (wink) I hope you join me next week for another post. Until then take care, be safe, stay healthy and enjoy every moment.
Sincerley,
L. Grace Lauer